Many people who wish to pursue a self sufficient lifestyle or start a homestead are often held back by fear, or excuses. When I have more land, When I have more money, etc. etc. There are several solutions to get around the fears and government restrictions, even if you live in the middle of a major city on 1/10th of an acre.
Could you hurt this face?
The first option is rabbit. Rabbit is hands down the most efficient livestock in converting feed to meat. One buck and four does are almost enough to provide all of the meat requirements for a small family. This is due the the origins of the expression, “breeding like rabbits”. You can also feed them straight from your lawn, and their poop is an excellent fertilizer. However, you have to be able to “harvest” your rabbits, which many people are unwilling to do.
The second option are chickens. They are easy to care for, and the most popular beginner’s livestock, but they are illegal in many cities, and if not cared for properly they can stink, be noisy, destroy things, and make you a bad neighbor if you aren’t careful. If you are lucky enough to be able to keep chickens, and are willing to do so, they are a great start.
Since I live in an oppressive city on a fraction of an acre, chickens aren’t an option, and Mrs. Tinker wouldn’t stand for dead bunny rabbits. That leaves a third option, QUAIL!
Quail are a fraction of the size of a chicken, so you can easily keep a dozen quail in a 2×4 cage. Quail eggs have several health benefits when compared to chicken eggs, although their larger yolk to white ratio means they have a slightly higher cholesterol count per serving. Quail are more consistent layers, and eat a fraction of the feed for the same volume of eggs. They also mature to egg laying age in about 4-6 weeks (1/3 to 1/4 of the time compared to a chicken), so it costs you less time and feed when raising your own quail for eggs. When raised for meat, quail are also more efficient than chicken, although not as efficient as rabbit. They are basically single serving birds (less packaging/ butchering involved), making processing and storage easier. Many people are able to completely clean a quail in just a minute.
There are several varieties, and quail is generally considered a game bird, which might get you into trouble. However, the coturnix quail has been bred in Japan for thousands of years and is considered a domesticated breed. Just like dogs came from wolves, the coturnix is a breed that has been bred for efficiency in egg and meat production, and won’t even go broody (want to hatch her own babies) while many chickens still do. Due to their tiny size, and the fact that they can fly, they are very vulnerable and can’t be left to free range or they will become dinner for any number of small predators. They must be kept in a cage at all times, although they can be tractored to allow them the opportunity to walk on grass and hunt for bugs. I learned quickly that this is generally a bad idea in a small back yard; they poop a lot and it attracts lots of flies if not managed properly.
In my next post, I’ll talk in more detail about raising quail and show you my setup, and what I’ve learned so far.
It’s finally done! The plants are out, the room is cleaned, the food is in!
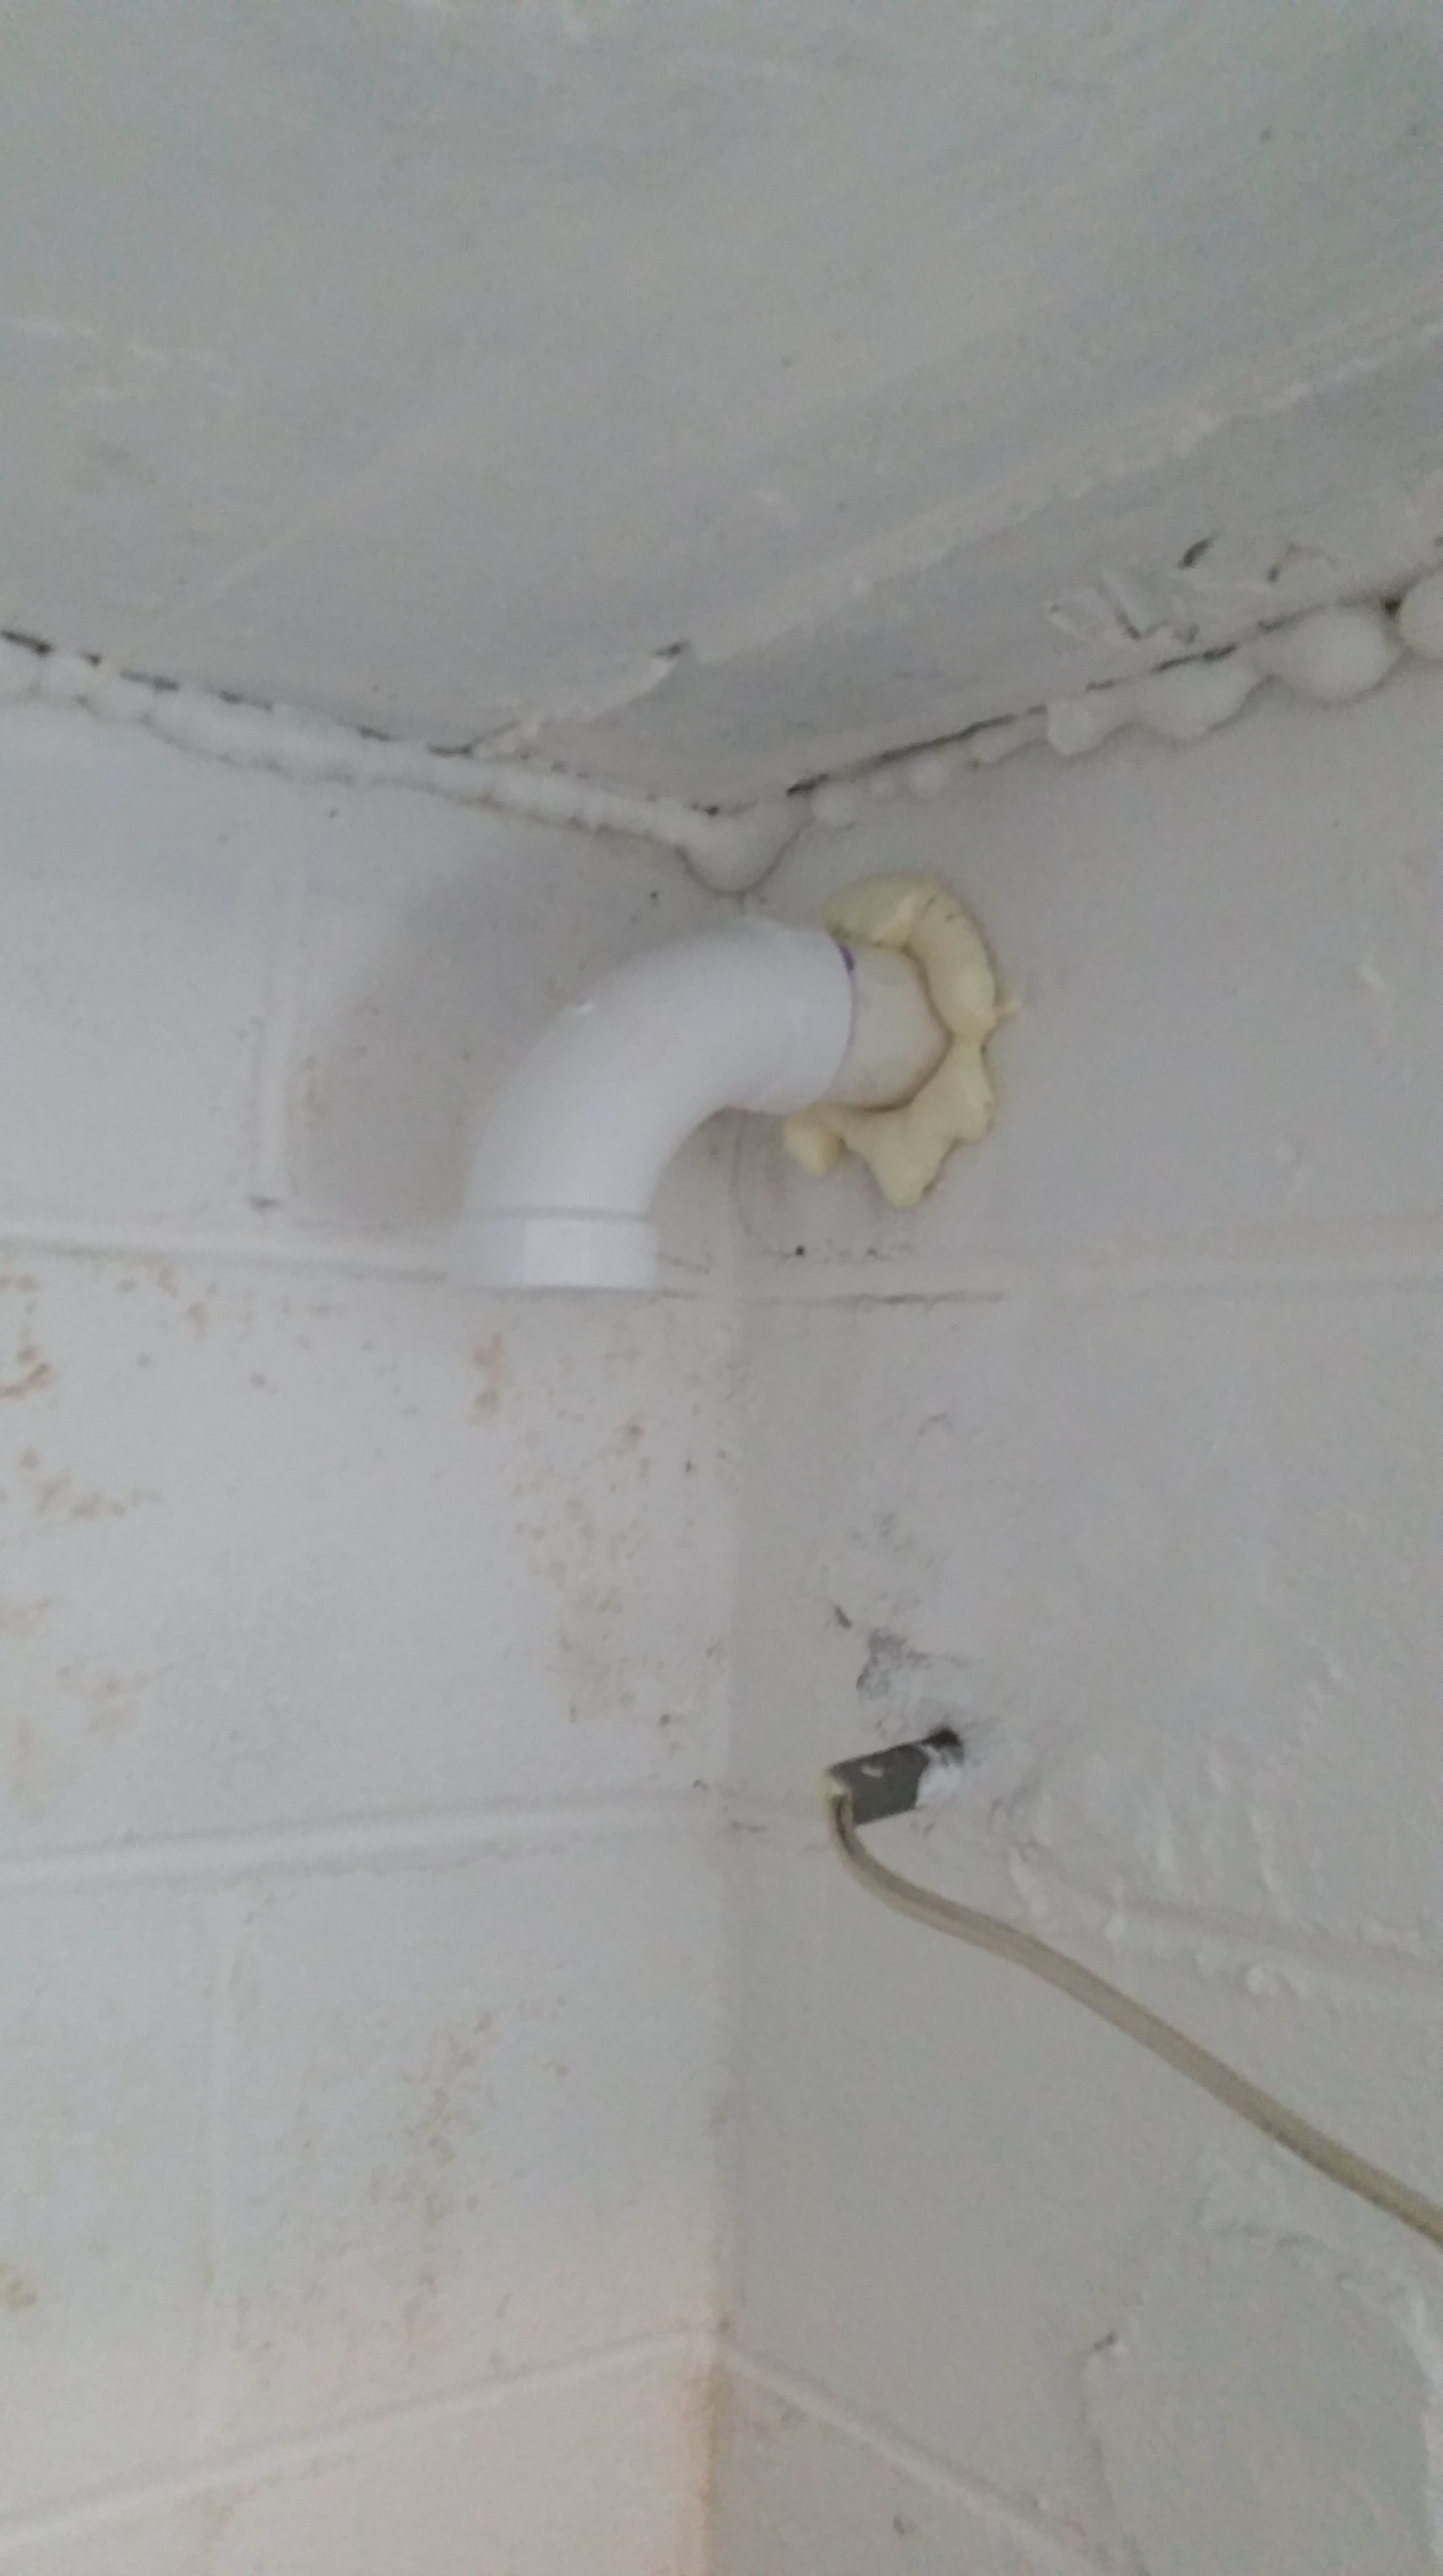
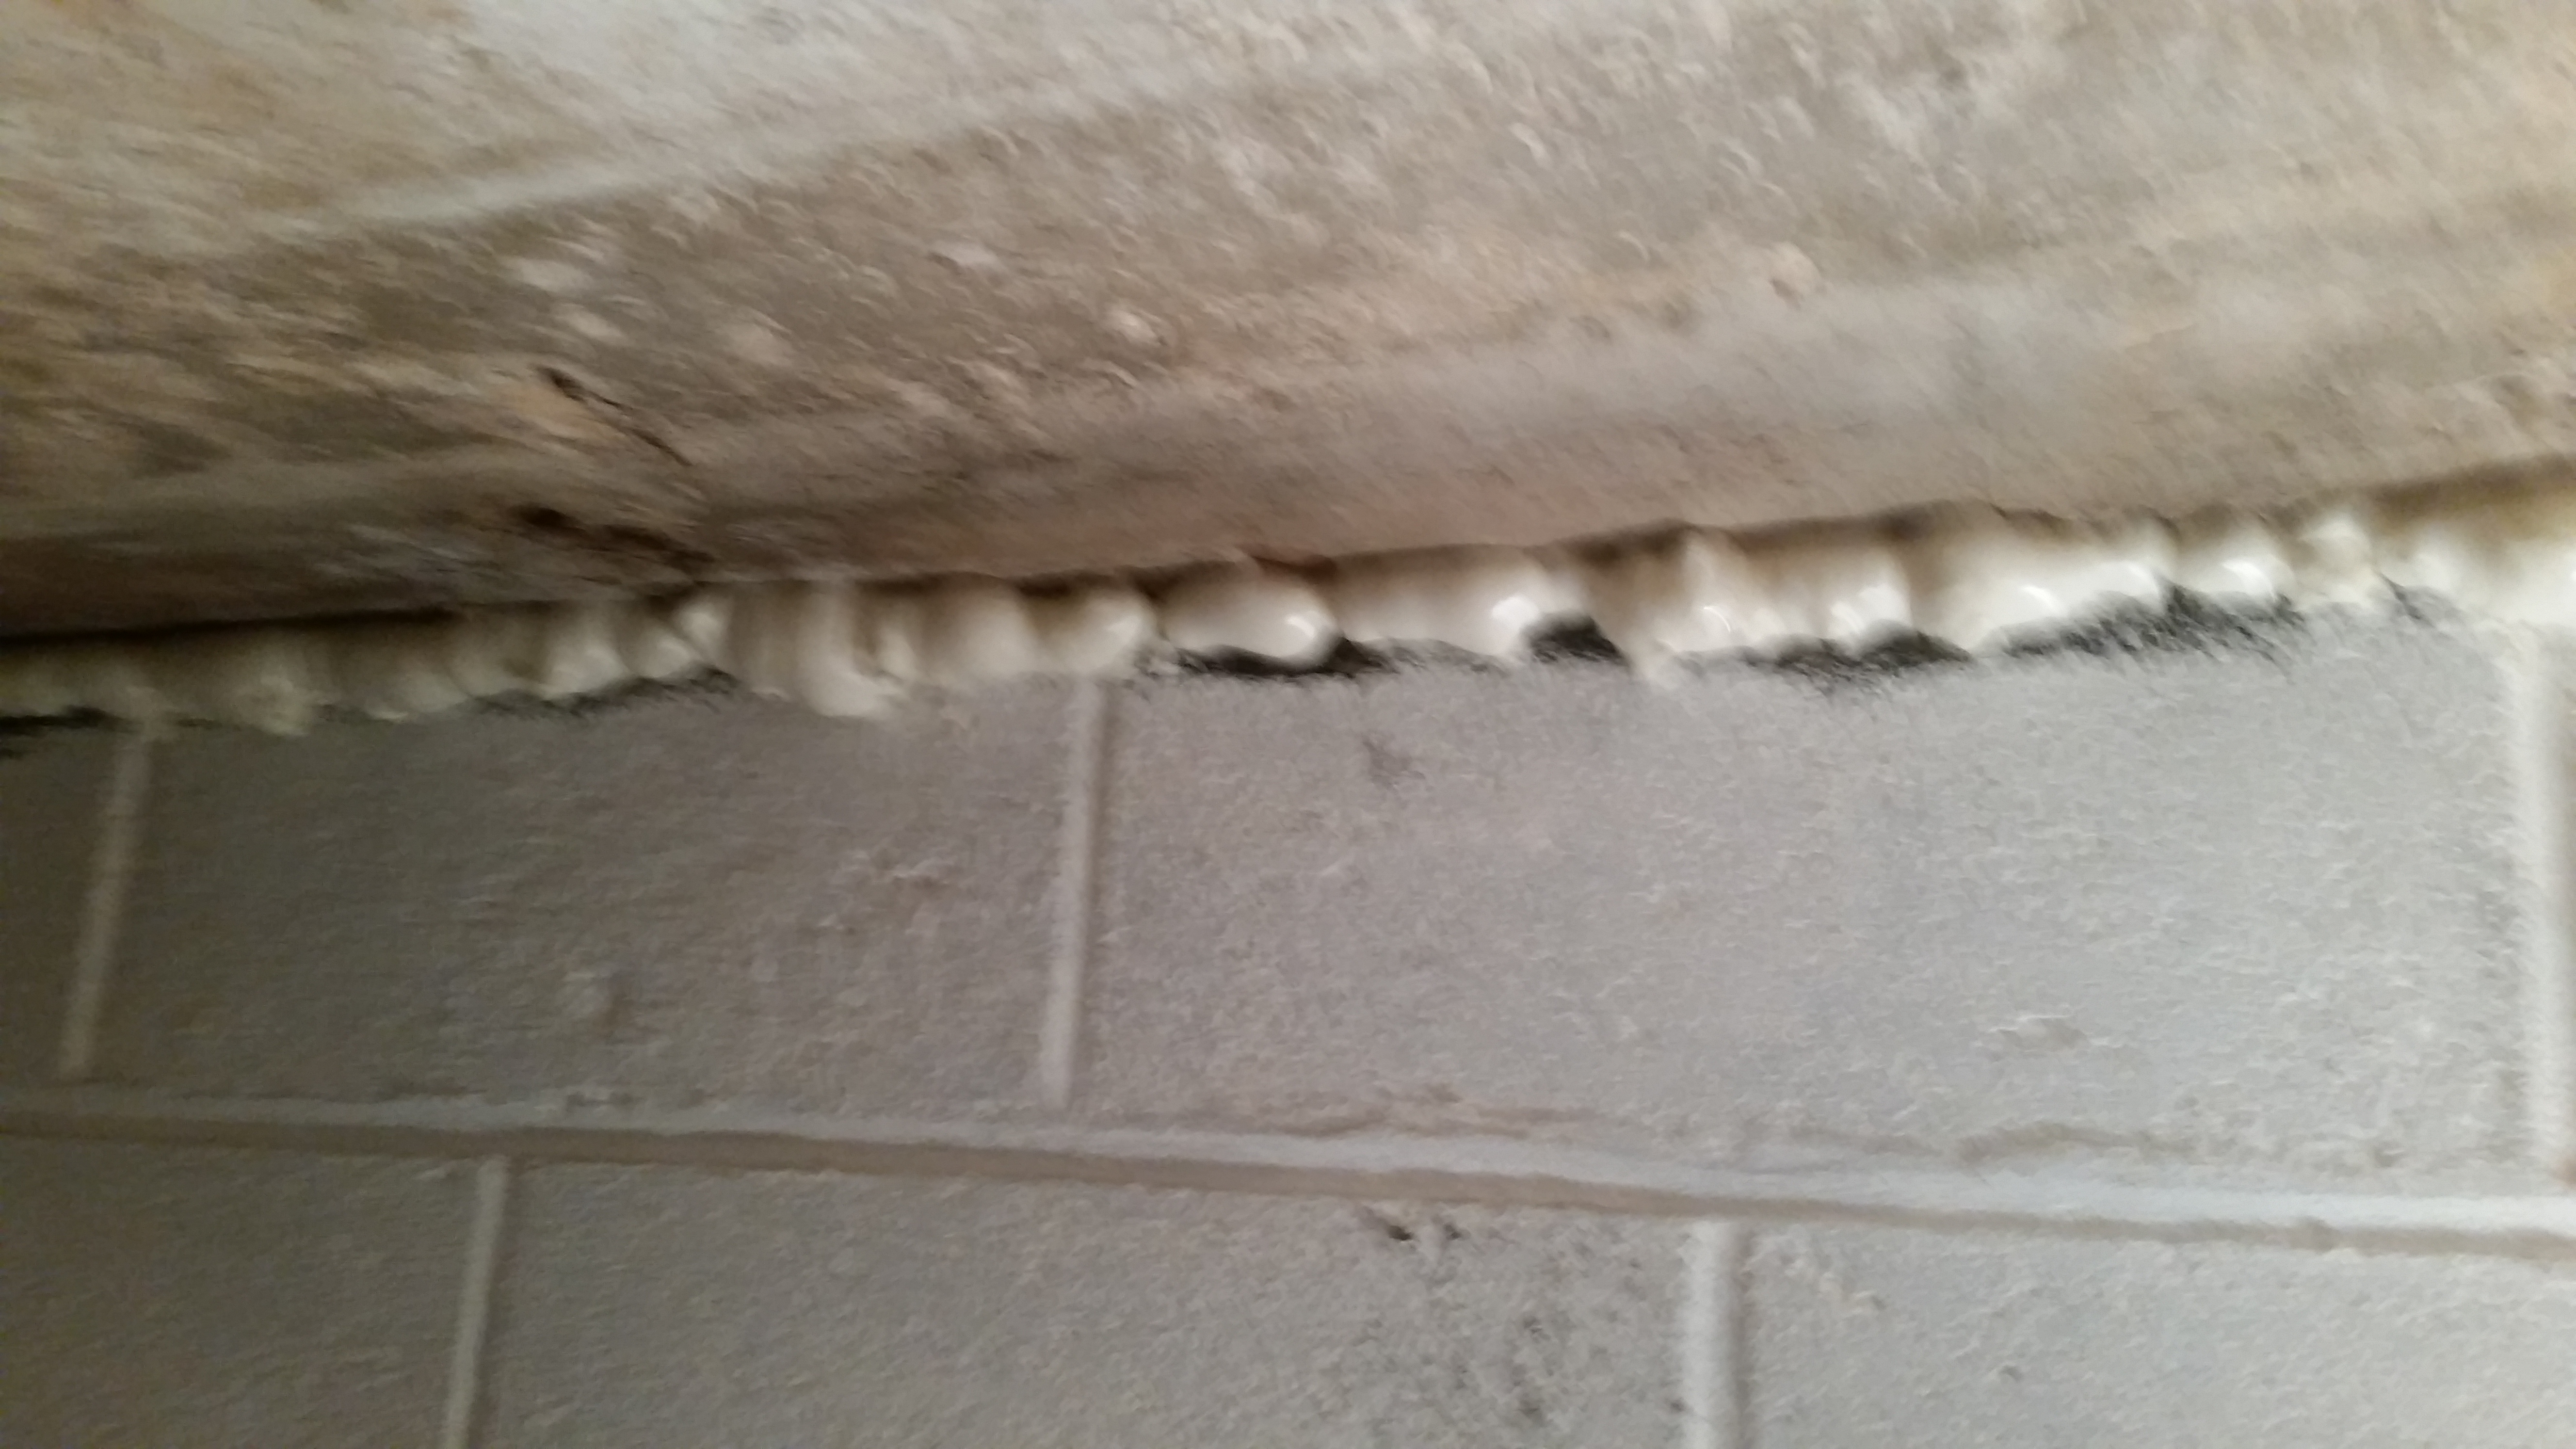
As I mentioned in the earlier posts about root cellars, they need to have good ventilation to prevent spoilage and growth of mold/mildew. I accomplished this by breaking two holes into the walls, one outside and one into a secluded portion of the basement. I used pvc piping and a floor drain with window screen to keep any insects from getting inside, then sealed it with spray foam insulation. I did the same thing minus the floor drain (only screen) for the vent into the basement. This will allow a cross breeze, which can also be manipulated for a limited amount of temperature control.
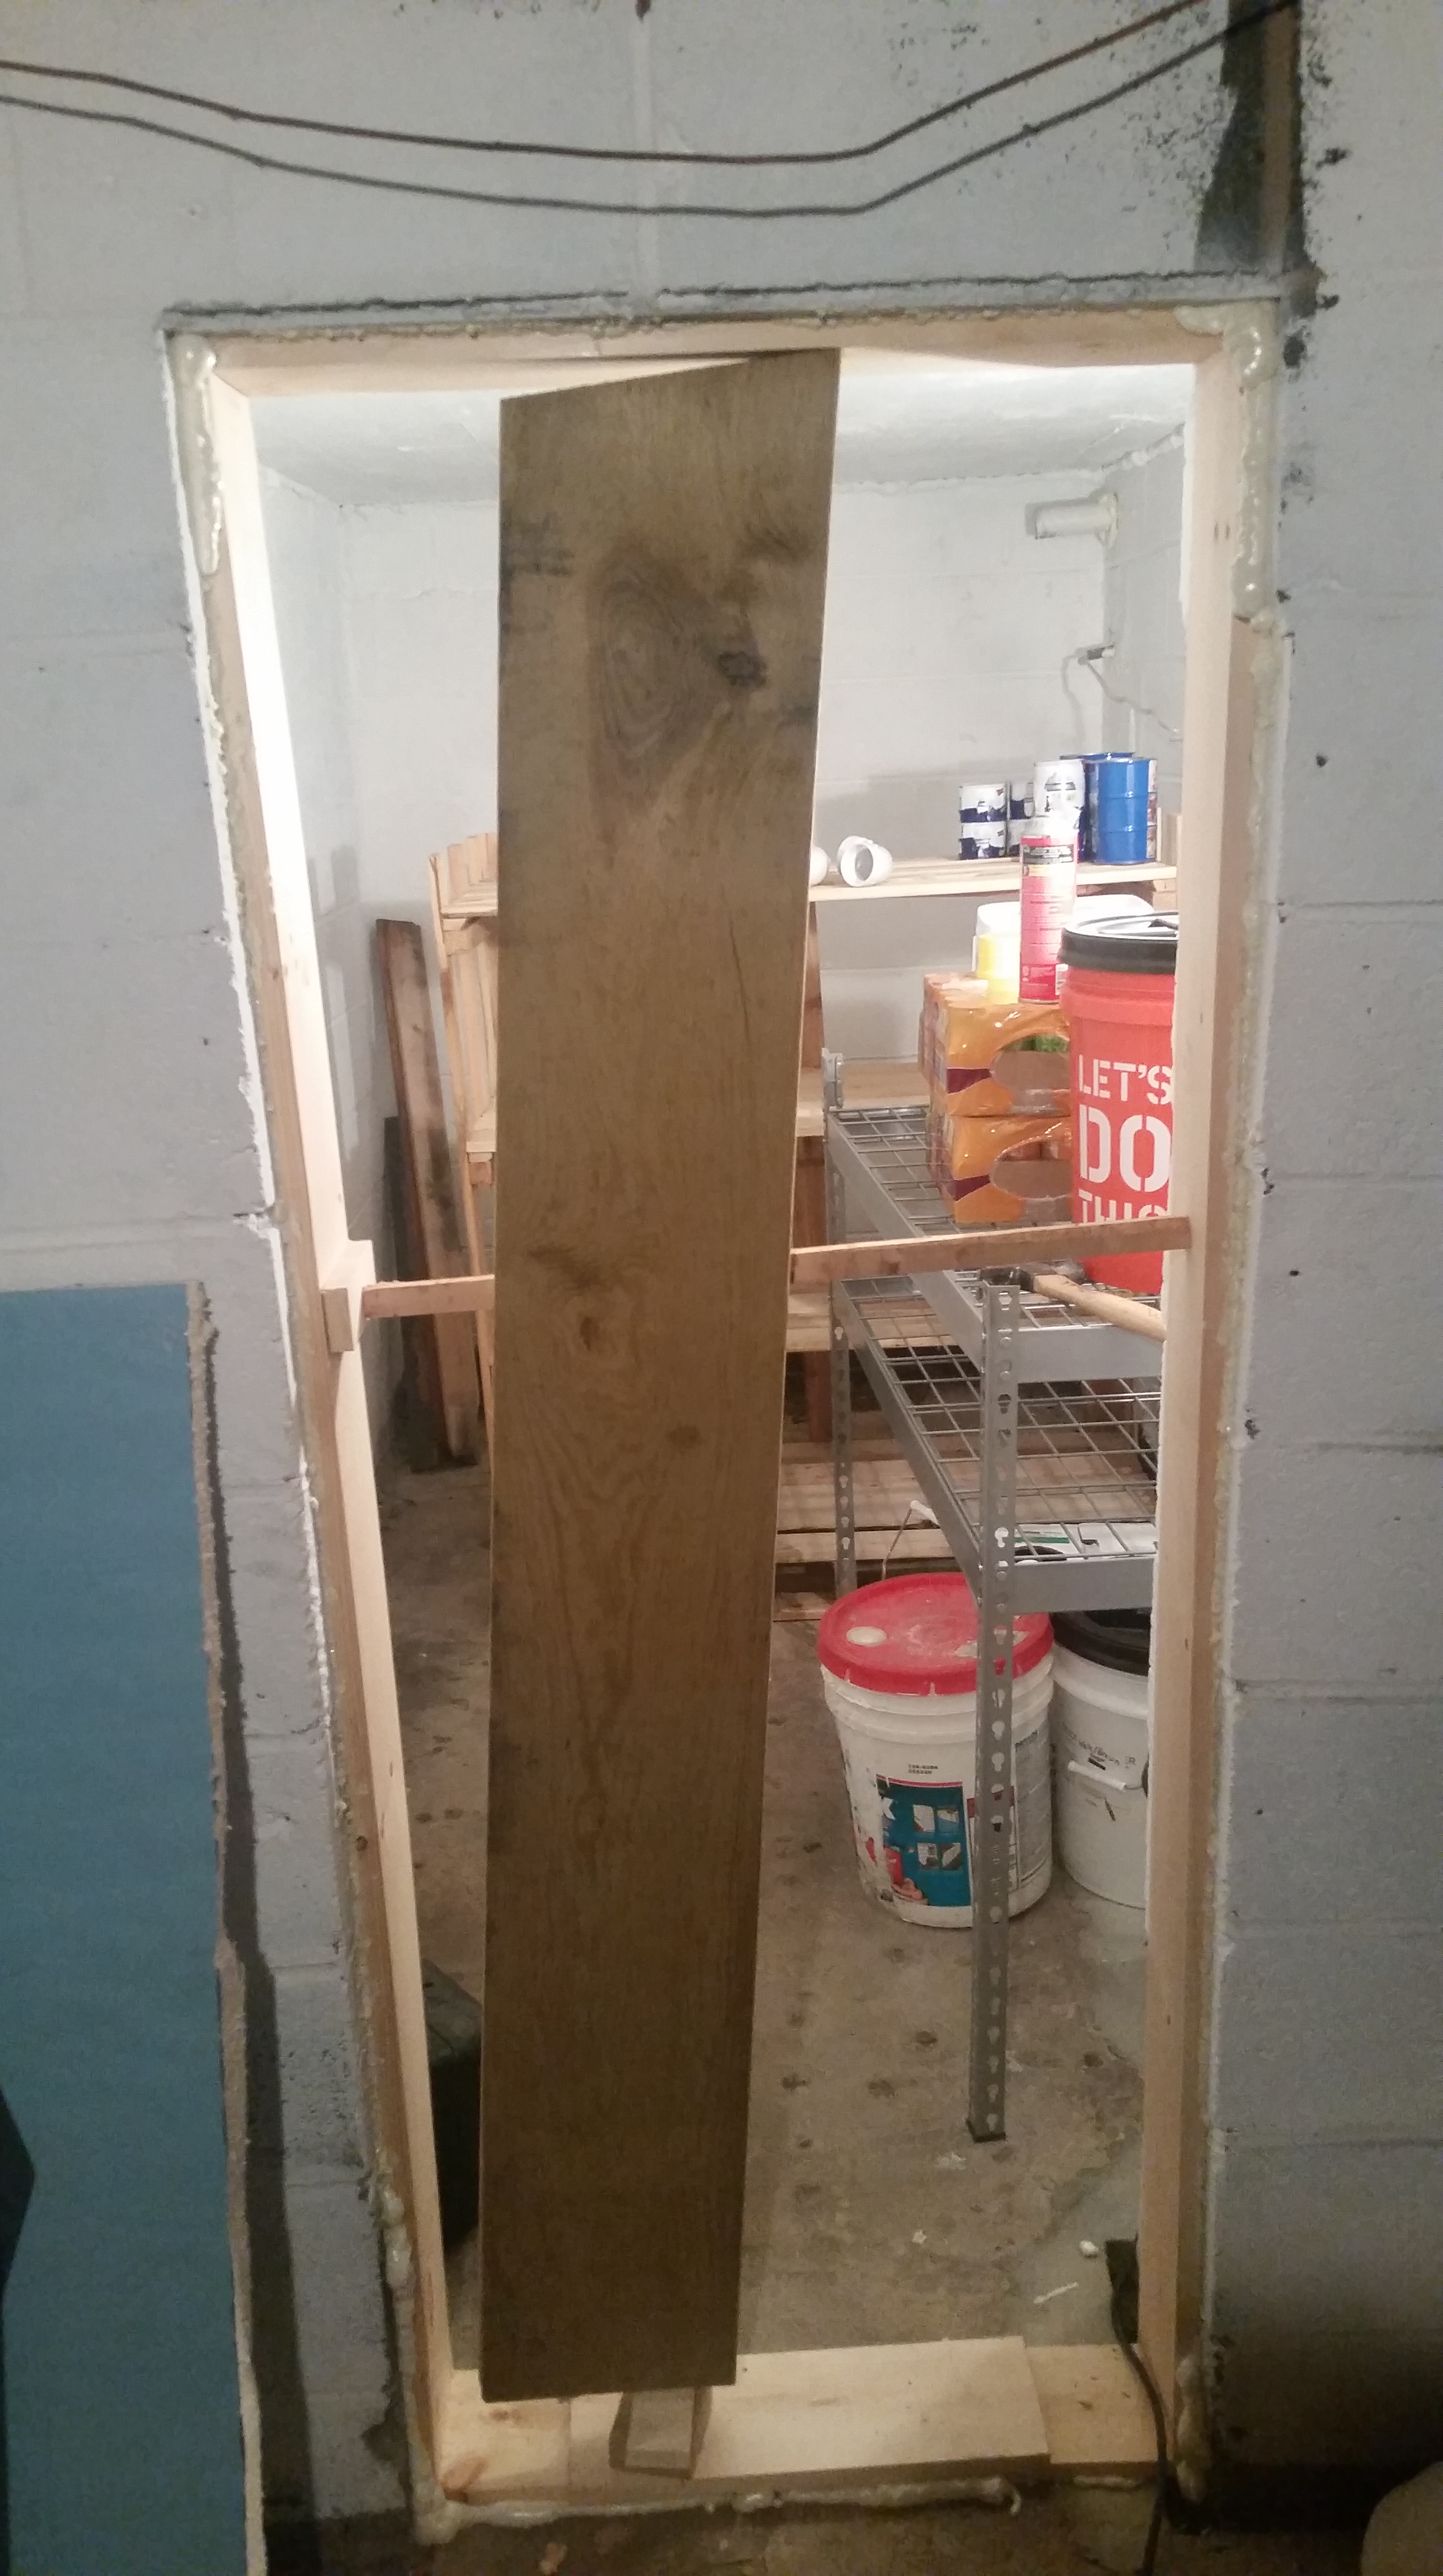
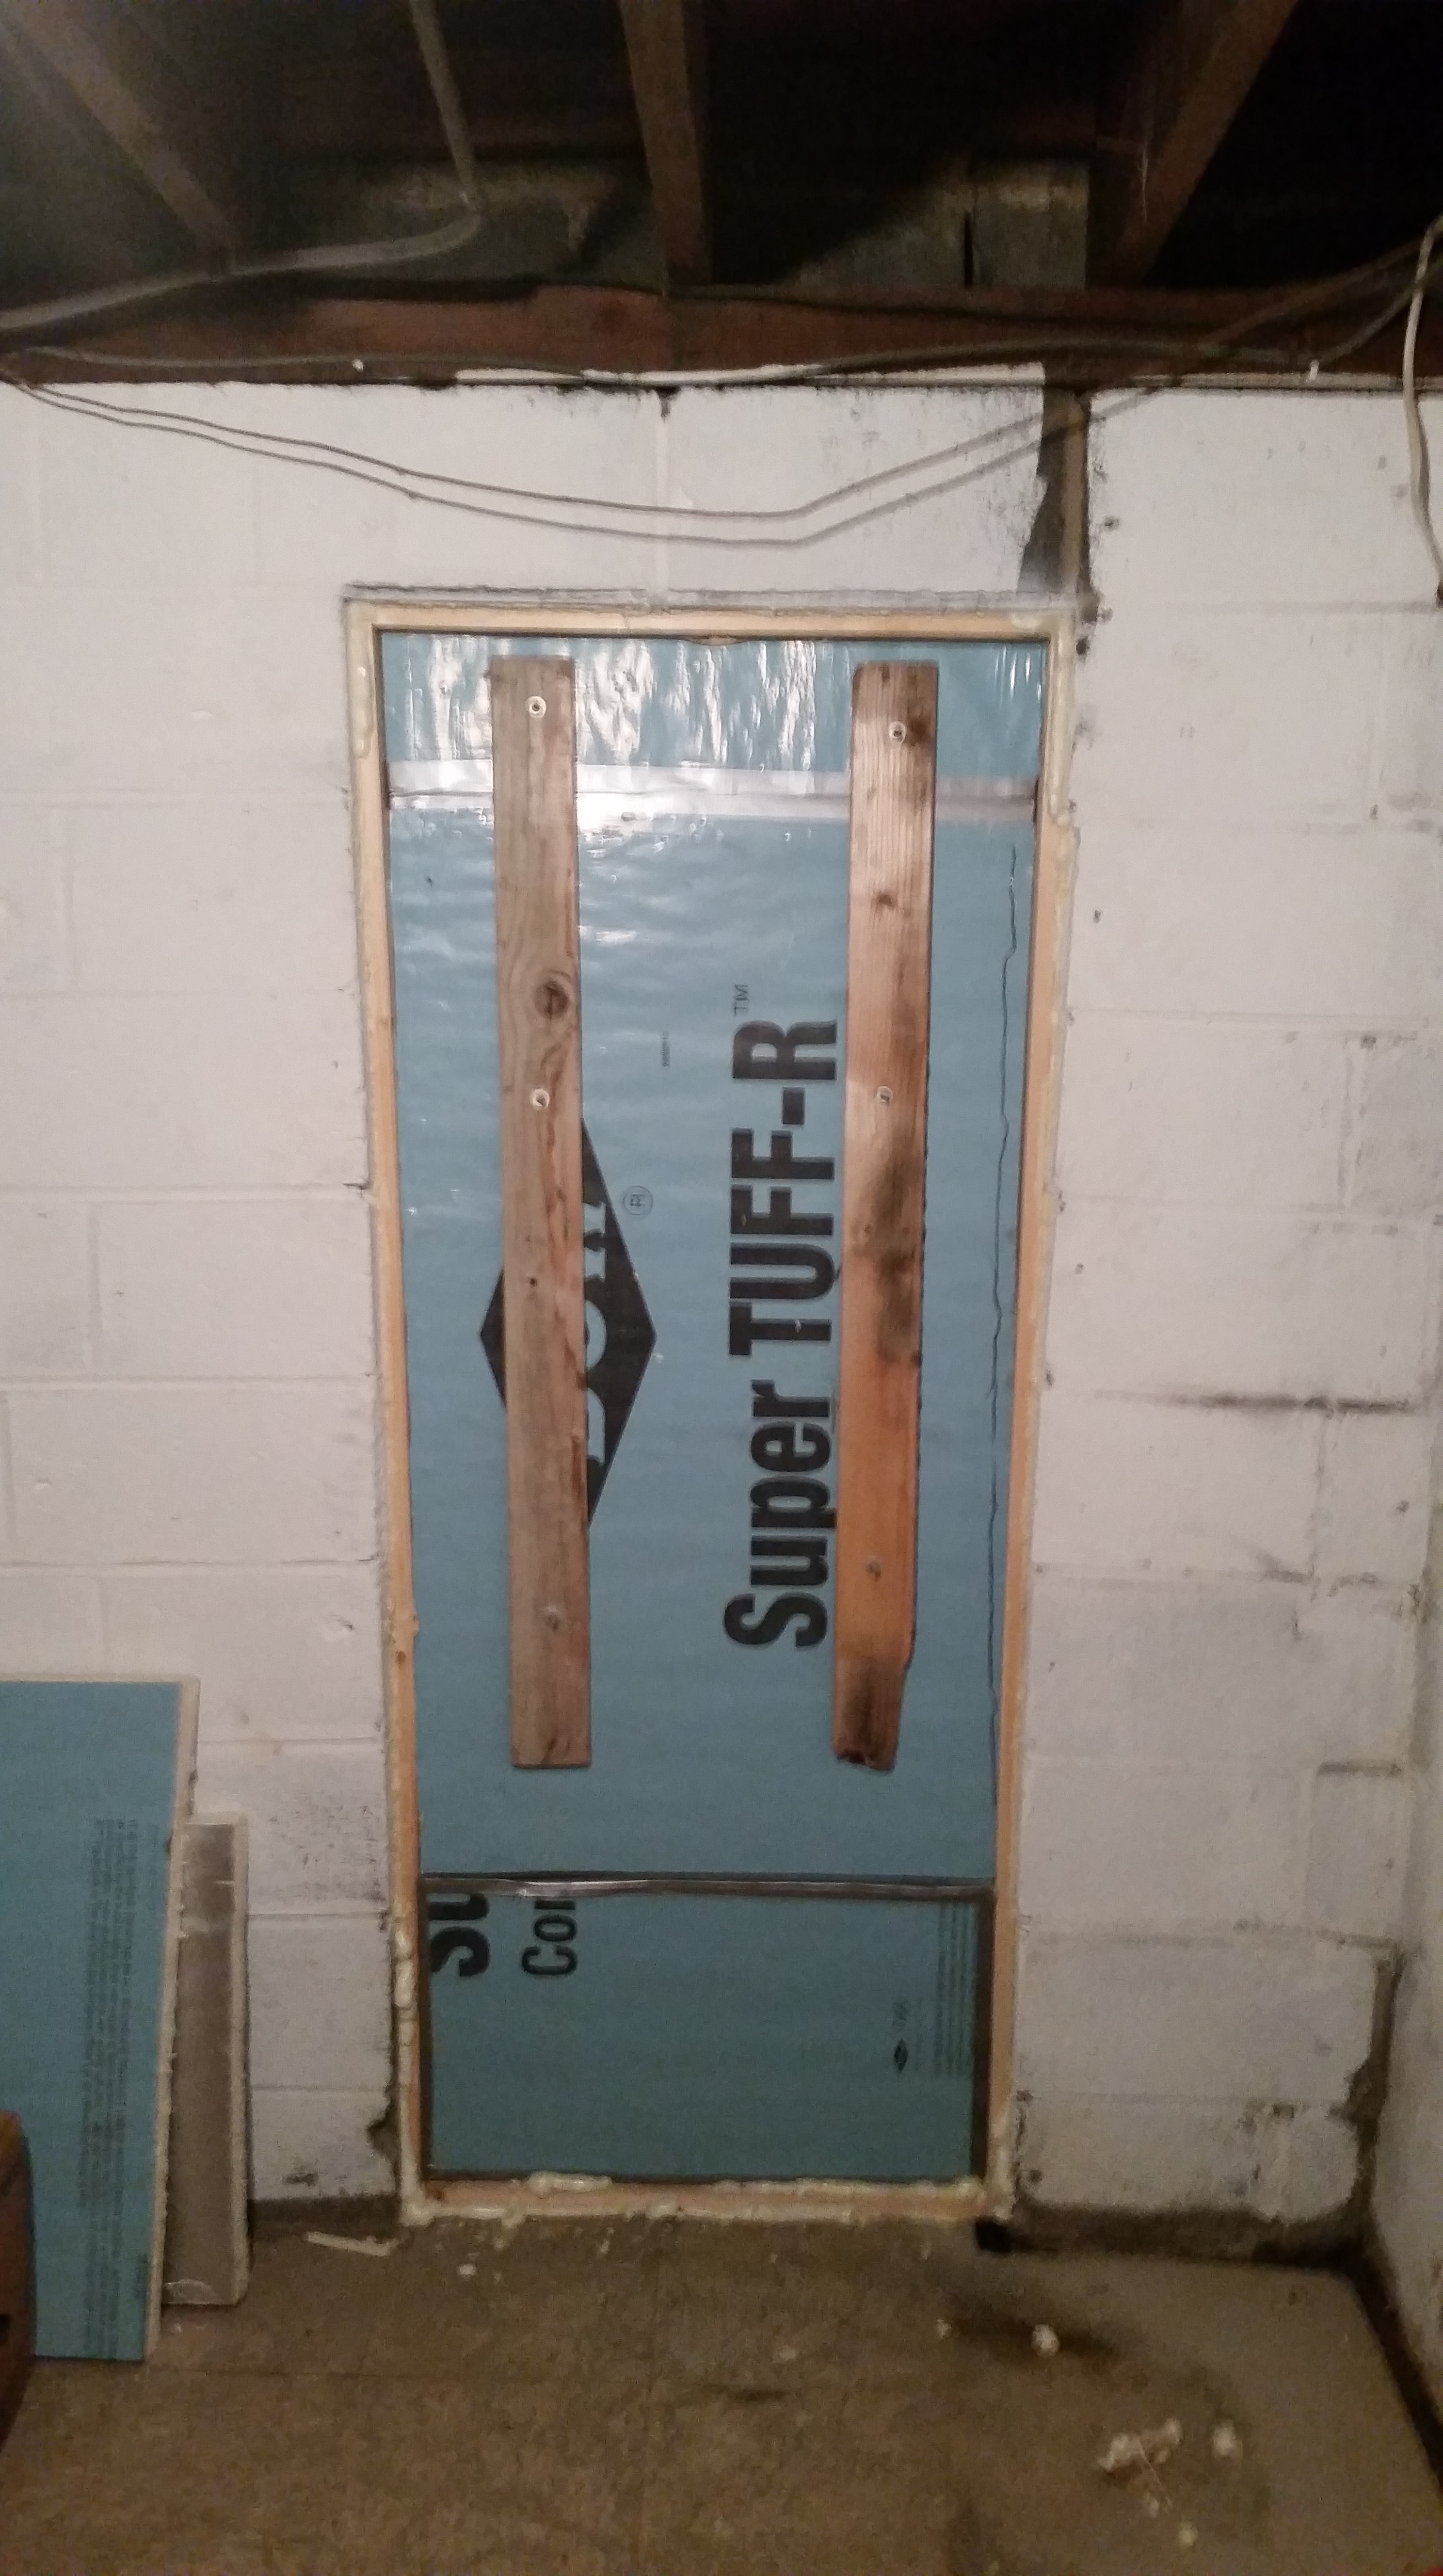
After installing the vents, I also had to make it bug proof, both for food security when i have fresh/raw produce, and so lady tinker will feel safe going down there. I accomplished this by waterproofing the entire room and sealing all the cracks. I also had to install a bug-proof doorway, which I cheaply accomplished using some boards, more spray insulation, and scrap 2″ foam boards from an earlier project. I also packed some foam into the french drain under the door frame to allow water out but keep any insects from getting in.
improvised doorframe braced until the insulation hardens
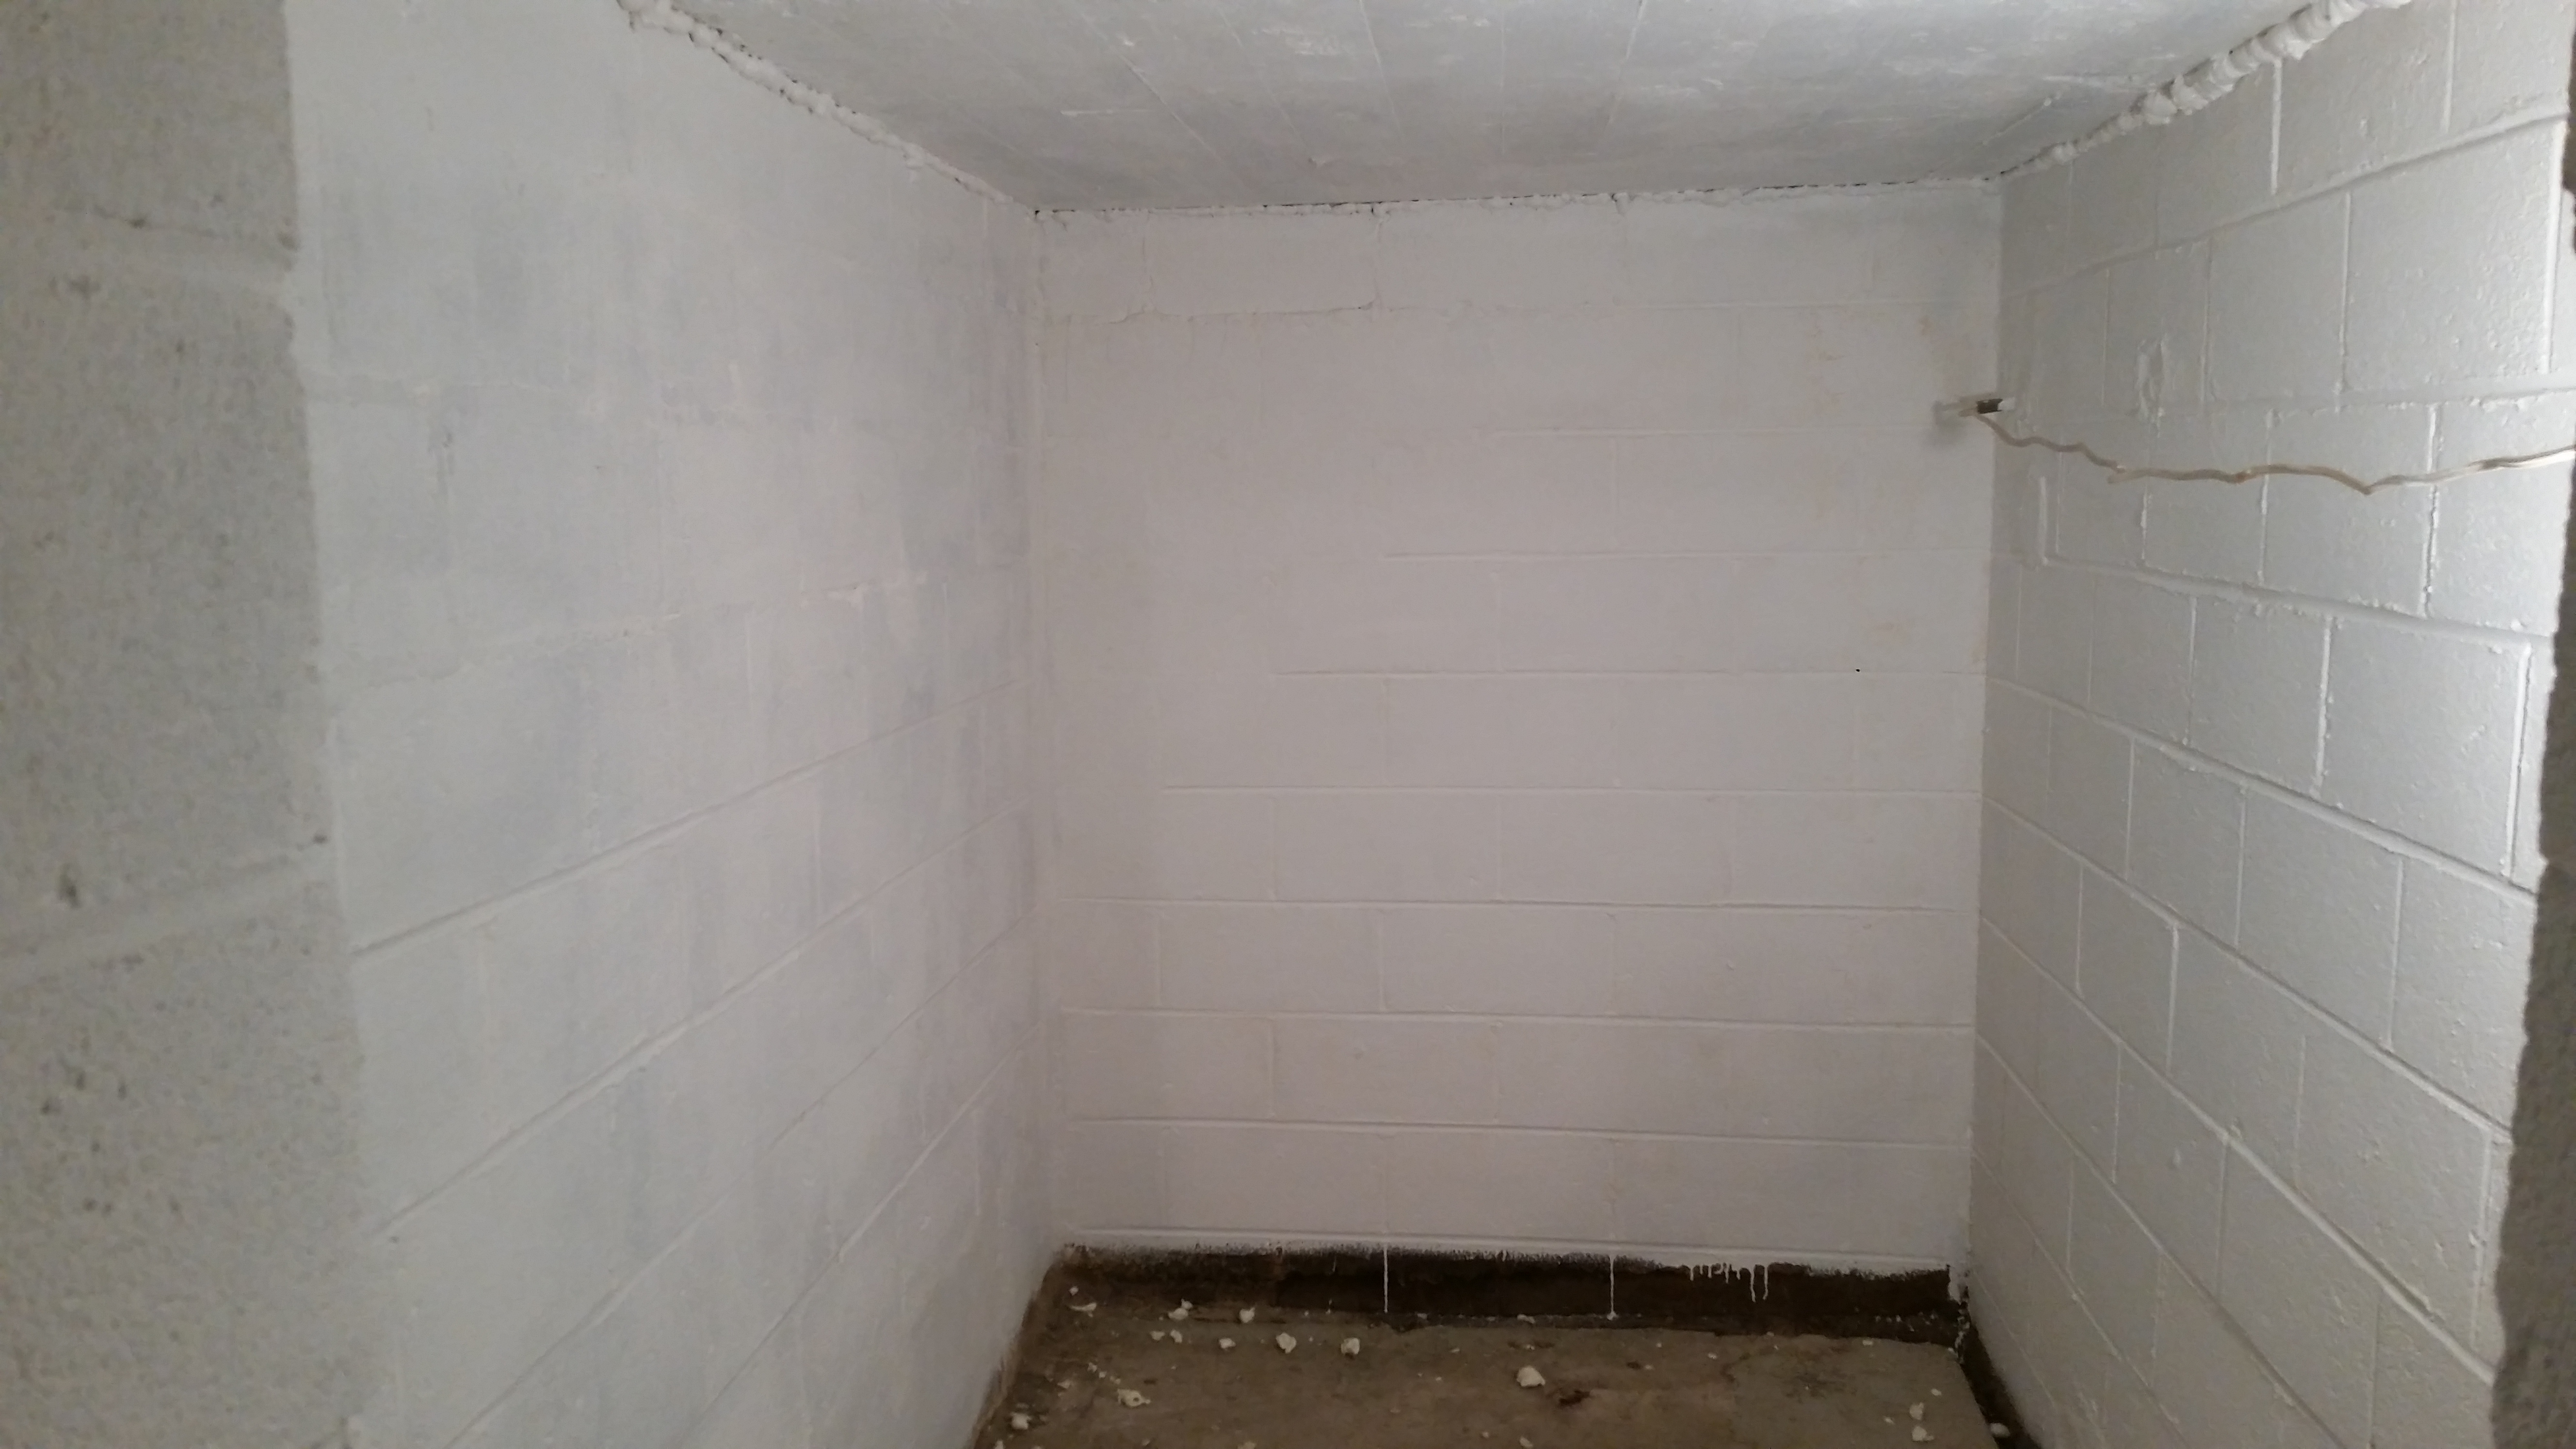
So it’s Done! Other than some experimentation with automation to play with fans and temperature controls, it’s now a fully functioning root cellar. This will significantly increase our storage capacity and free up space in our pantry in the spare room upstairs (which was honestly a little crowded with shelving).
So, we talked about why you should care about security and how to protect yourself online, Now let’s talk about a few specific resources you can use.
EMAIL
This is one of the less critical steps, especially if you utilize auto forwarding services from temporary email accounts, but if you have sensitive information or are worried about hacking, you should consider an encrypted email service. Encrypted communications are just another level of security where even if someone intercepted an email, or acquired your login information, they would still have to work for the information. The best encrypted email I have found so far is a Swiss company called Proton mail. You can request a free email and be put on a wait list until they have sufficient server space, or pay for premium service with additional features. Proton mail specifically also has the ability to encrypt outgoing emails, so even if you sent an email to a standard Gmail or yahoo account, the email can’t be opened by the recipient with out a password to decrypt and open it. Also as a perk for those of you that don’t trust the government, you can request a .ch vs .com email, so your account is based in Switzerland and can’t even be hijacked by a federal subpoena.
MOBILE COMMUNICATIONS
Just like with email, you should protect your mobile communications, especially since a phone is so easy to steal or intercept via your service provider. You doubtless have heard about the recent Apple pushback on decrypting phones. Iphones are by default encrypted if you use password protection, while android devices must be manually encrypted in their security settings. I strongly recommend everyone do this, as it costs you nothing but increases your personal security from people attempting to steal personal information from your phone’s hard drive, it’s even giving the federal government trouble. Note that encryption only protects locally stored data, anything backed up on the cloud or elsewhere can still be seized via a warrant from Apple (Google, Dropbox, Verizon, etc.)
Just like with email, you should consider an encrypted messaging service for your phone, otherwise your service provider will still have a record of all your messages, and be prone to a malicious hacker. As always, be wary of specific applications and do your research. For instance, the secure messaging service “WhatsApp” was purchased by Facebook about two years ago. Considering Facebook’s revenue model, which includes intensive data mining and advertising, it’s unlikely that “WhatsApp” is a very reliable encrypted messaging service. Signal is a pretty good resource, however it is only secure through the data plan on Iphones.
That’s a basic rundown of digital security. It’s enough to get you started if you decide protecting your identity is something worth pursuing, and should get you on your way towards a more secure, private lifestyle.
So, it’s been a few months since I started using the cellar as a grow room, and one big lesson learned is the basement was too cool. I will definitely need heat mats to germinate seeds in the basement next year, the only plants that really did well were the tomatoes.
I’ve started hardening off my tomatoes, and I had a few late starts, like my pepper plants, along with some calendula and lupine. Since the grow bed has started slowing down, I’ve started converting to root cellar mode. I’ve discovered Home Depot is a treasure trove of free wood in the form of palettes. Especially in the spring, when they get rid of pre-fabricated shelving that their plants are sold on (score!).
This was just a quick update post; my garden has had a late start with all the crazy weather, but I’ll show what I’m doing this year soon.
Well, last time I talked to you about the benefits of a root cellar, and the beginning of my process to convert a corner room of my basement into a root cellar. I started by cleaning it out and sealing some of the larger cracks in the wall.
I have since painted the walls with a waterproof paint to help keep it clean and prevent the walls from leaking. I did a little investigation and found where the leak was coming from outside and patched it up to help keep the water out. I also vacuumed and swept the floor so the room would be nice and clean.
The next steps will be to install a tight door to help insulate the room and keep critters out, and to install a means of ventilation, which I will likely do by breaking a pair of small holes in the wall and installing vents.
I won’t actually need the root cellar until fall, so I will be using it in the meantime as a grow room to start my plants for the garden this spring. The concrete walls will allow me to setup automated irrigation without worrying about water damage, but I will need to make sure the room doesn’t get too cool.
It’s time to start getting ready for spring! If you don’t have space for a garden, or just like to have a few plants closer to or in the house, you’re going to have to pot your plants. One thing people don’t always consider is the cost of dirt, a quality potting soil can be a little pricey if you have more than one or two plants. You can get away with cheap stuff, but it is usually either poor in nutrients or filled with weed seeds or chemicals, so why not mix your own? A good potting soil needs to be light so you can move it, rich in nutrients, and have the right drainage and water retention properties based on what you want to grow. Let’s cover the basic components of potting soil and what they do for you
Dirt(top soil):
It’s pretty straightforward, you can buy sterilized potting soil (no weed seeds) from the store, or dig some up dirt from your back yard. This is a base to start from with nutrients for your plants. Compost is better, but dirt will do.
Compost:
Decomposed organic material, the gold standard. You should always use compost if you can get some. This is one thing where local is better; the best part of compost is that it’s literally alive. If you make your own or buy local, chances are there are still microscopic organisms that your plants will benefit from. Store-bought will still be rich in nutrient, but will be completely dead. You can get around this by mixing small amounts of finely shredded vegetable scraps or paper if you can’t find quality compost, it will break down in your pot and act like tiny compost nuggets over time.
Manure:
AGED manure (partially composted) is a great addition, and acceptable substitution for compost. Do NOT use human or pet manure, our diets leave behind too many toxins to be safe to use. Instead look for a local farm with horses or cows. If it didn’t just come out of the back end, you’d be surprised how little it smells. I spread two trailers full of horse manure for my garden in the back of an 1/8 acre lot and nobody would believe there was so much horse poop in my garden.
Worm Castings:
Aka worm poop, is somewhere between compost and manure, and is very high in minerals and nutrients, but are pretty expensive if you try buying from a store instead of producing your own. If you are buying it, I recommend you use small amounts as a soil amendment instead of as a base for your potting soil.
Perlite:
This white stone “popcorn” increases aeration and drainage for the health of your roots. It is covered in microscopic pores, which provides excellent habitat for microscopic organisms and keeps your pots nice and light
Vermiculite:
Frequently confused with Perlite, Vermiculite is similar in that it improves aeration and drainage. However, Vermiculite is more of a brownish mineral-based sponge which is better at retaining moisture in the soil, and less efficient at aeration than Perlite. Which one you prefer depends on the needs of your plants.
Mulch/wood chips/bark:
Relatively light weight and in large pieces, for most plants you want to use small amounts of this to help with texture, aeration and drainage. Cedar or pine bark/chips, or pine needles, are a good choice for acid loving plants. Instead of mixing it into your top soil, you can also cover the exposed soil after planting to help prevent evaporation and reduce the amount of watering needed.
Peat Moss/Coconut Coir:
It’s really a crapshoot in my opinion, because peat moss, while being very light, is both hydrophobic (nearly impossible to get wet) and a great amendment to help keep your soil moist. If peat dries out too much, it will be nearly impossible to get it to absorb any water. If you are eco-conscious, definitely go for the equivalent coconut coir, it’s derived from shredded coconut husks and is much more environmentally friendly than depleting peat bogs, which take centuries to milllenia to replenish.
Those are your basic ingredients for a potting soil, the ratios of which can vary greatly based on what you want to accomplish.
A generic potting soil can be made from two parts of compost/dirt, one part Vermiculite/Perlite based on if you want drier or wetter soil, and one part peat/coconut coir. You can add in a little mulch, bark, or leaves for more aeration and organic material, most plants can tolerate a wide diversity. Just make sure everything is very will mixed, and for the love of god don’t listen to those people who tell you to add rocks or packing peanuts to the bottom of a pot. This barrier between layers of materials with different sizes and textures raises the level where water will sit and collect, causing your roots to rot.
If you want to get more detailed, any quick google search should point you in the right direction if you are looking to accommodate a unique plant like succulents or ornamental bulbs.
With this blog series, I am going to share my journey of building my own root cellar with everyone and hopefully inspire somebody to do the same.
We’ve talked about being self reliant and keeping a well stocked pantry for storing large amounts of food in the event of an emergency, whether it’s a financial/economic slump, a weather storm, or the end of the world. Food that isn’t shelf stable typically requires special storage considerations, but it isn’t always practical or affordable to have three freezers or refrigerators. Instead, the tried and true method of root cellaring can be utilized.
The basic necessities (which coincidentally are how your fridge and freezer also preserve food) are cold and dark. A root cellar usually can’t get as cold as either, but it makes up for it with the third important factor that a fridge and freezer lack, air flow.
They can be as large and complex as standalone buried bunkers, an insulated closet or corner basement room, or as simple and inexpensive as a buried cooler or broken fridge .
I happen to be lucky enough to have an isolated corner room in my basement where the oil tank used to be. This will naturally stay nice and cold through the winter and require minimal extra insulating.
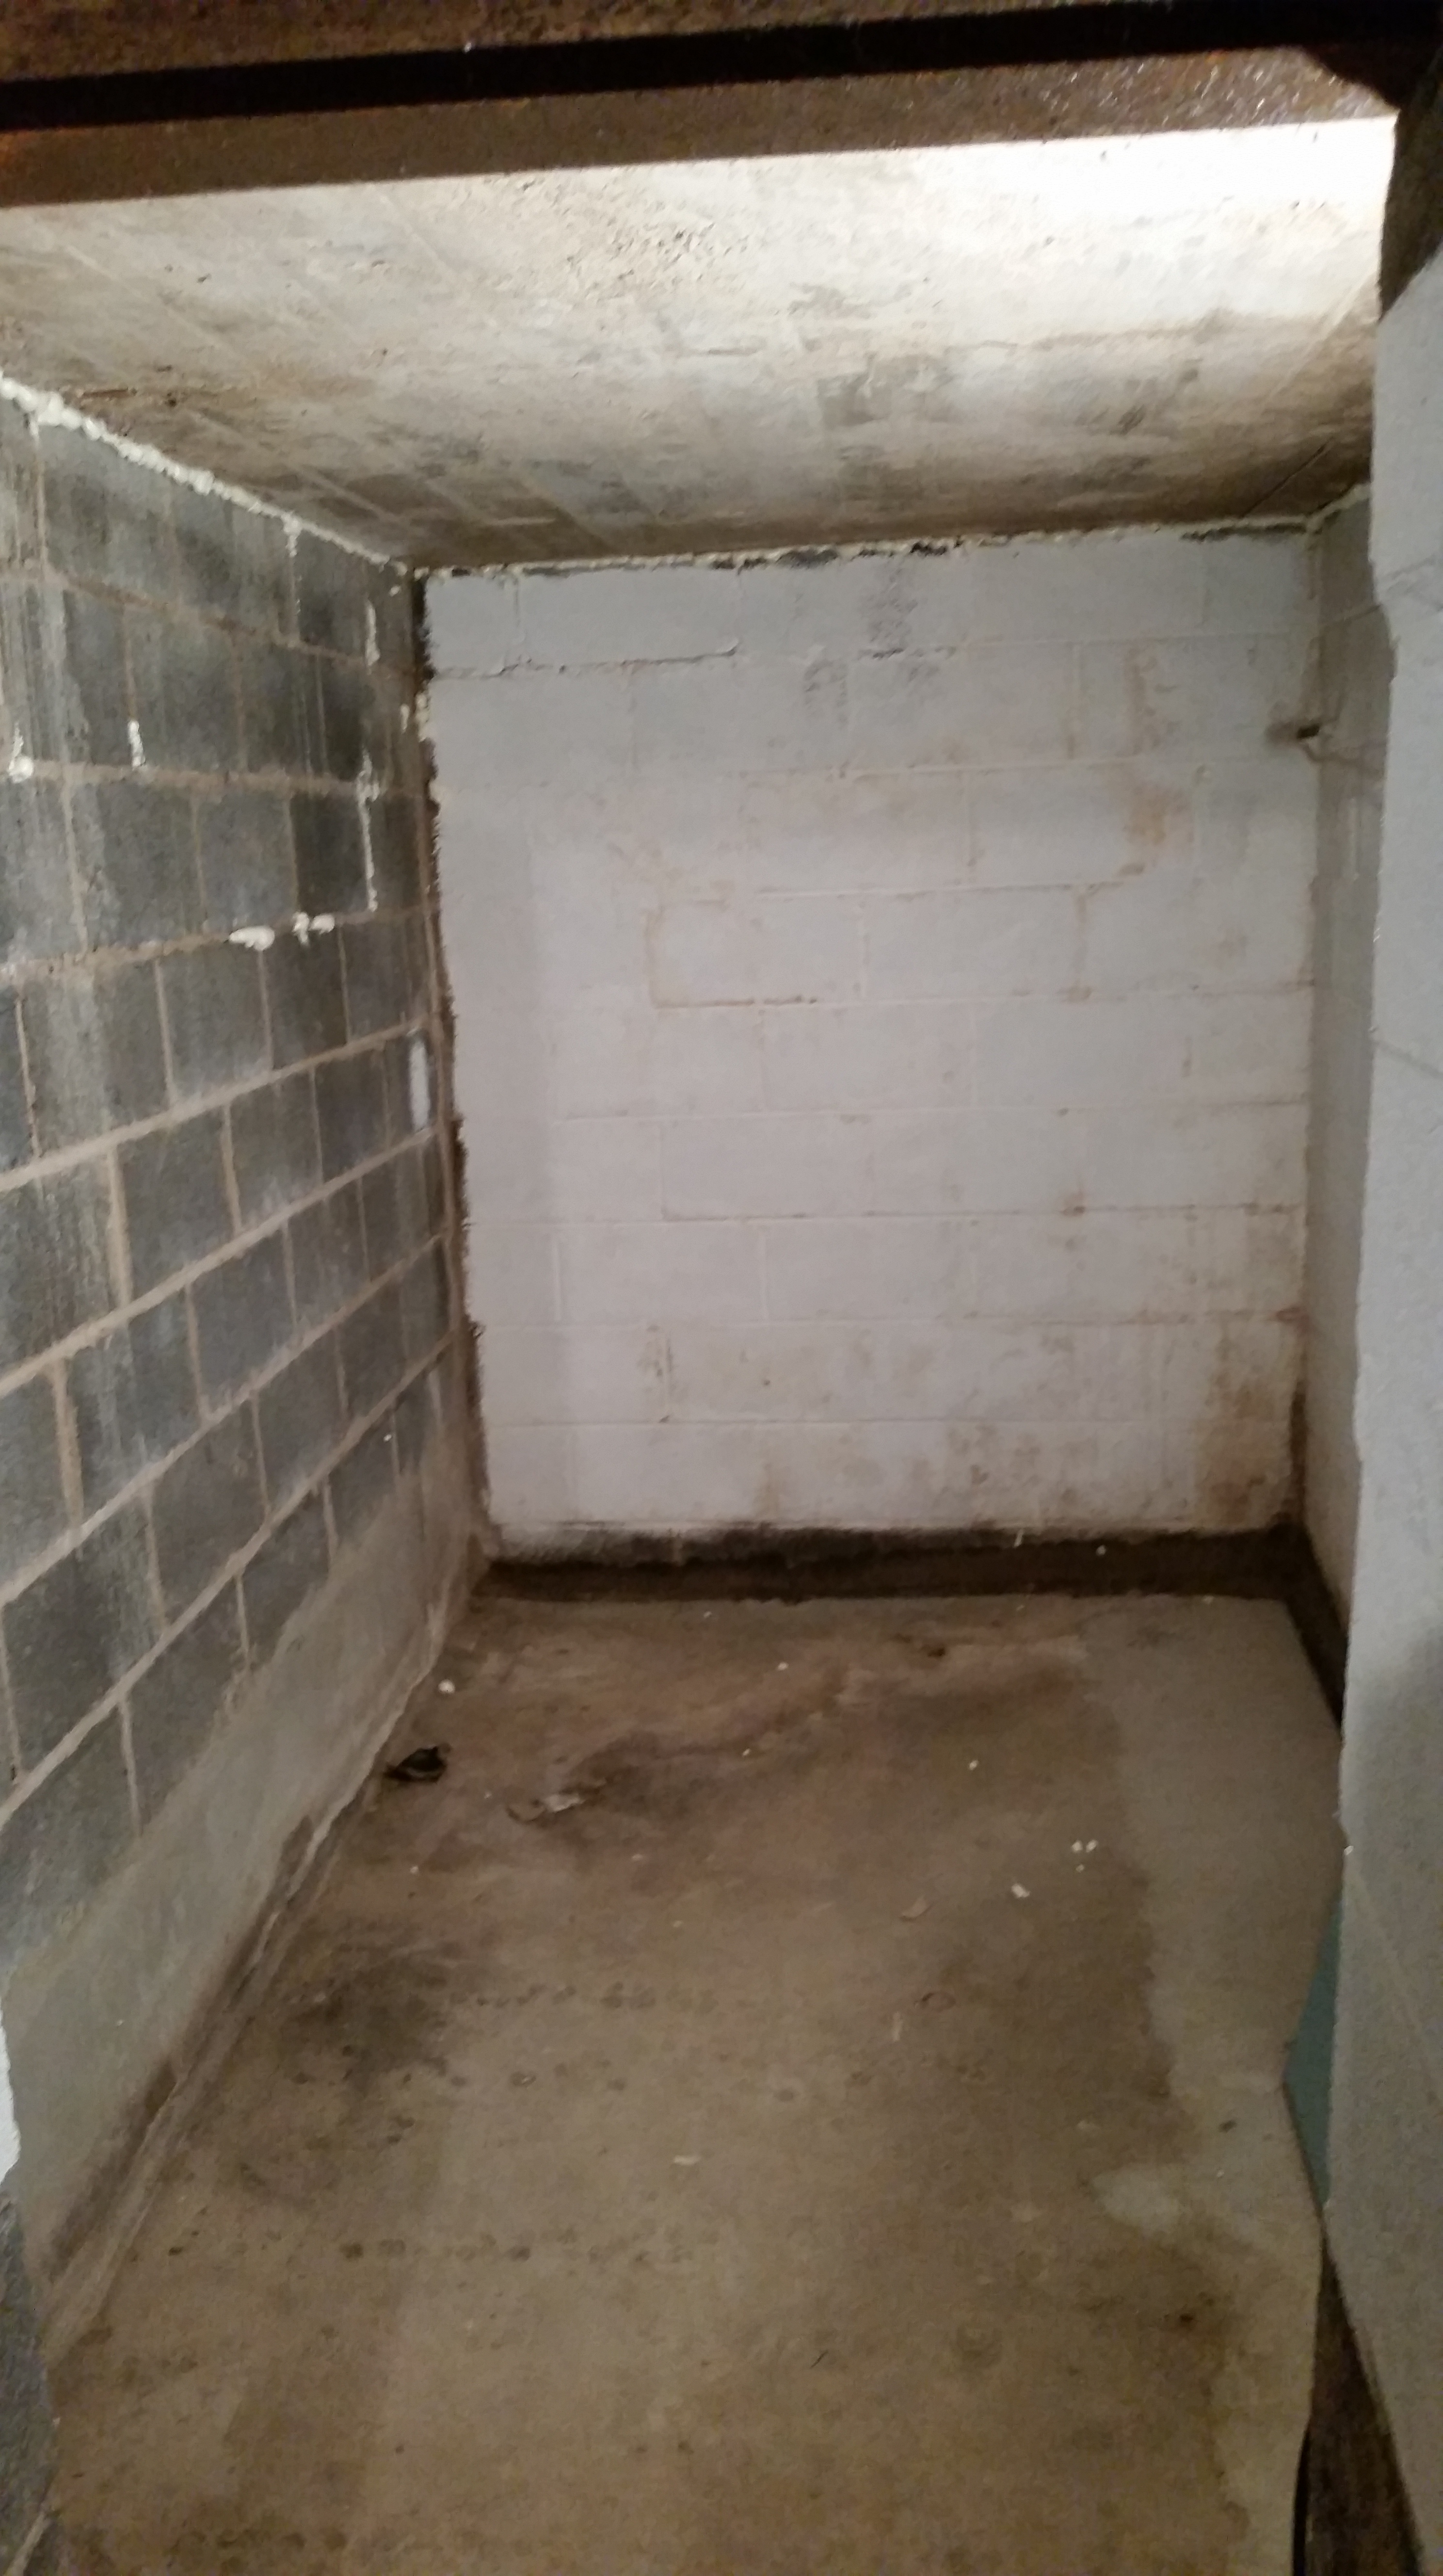
The cellar’s humble beginnings
You might be able to see that the room already has a french drain to help divert moisture from the walls to the sump pump. This can be a blessing if properly managed because produce requires a certain level of humidity, but I’m going to seal the walls anyway.
My first step however, is to completely clean it out. That includes sweeping every square inch to get rid of the dust and spiders (a necessity if lady Tinker is going to eat anything stored down here). I also got a few cans of spray foam to seal the bigger cracks to help insulate the room and prevent the bugs from returning.
Seal all of the cracks
Next time I check in, I’ll be waterproof painting the walls and ceiling to help keep it clean and prevent bugs from sneaking back in.
So last week I talked about why you should consider taking steps to protect yourself online, and now I’ll discuss options on HOW to protect yourself online. Basic practices, like discussed earlier, include being careful of what you share online like pictures and stories on social media. Be aware of any information you might be accidentally giving away.
PSEUDONYMS
Some of the easiest practices are to use (partially) fake names or email addresses for services that require information for marketing purposes, or “verifying your age”. Free services often sell this information to others for advertising to pay their bills. You can use your middle name or nickname, and anyone looking specifically for you will skip right by your info, and anyone trying to steal your identity will have mis-matching information. Having and using fake email accounts that auto-forward to your real email allow you to kill the spam flood once you realize someone has been sharing your info without having to lose your real email address. This can be done manually by creating alternate emails that auto-forward, or with services like junkmail.com or premium services like Blur.
BLUR Blur is a service that is dedicated to its customers’ privacy and anonymity. They pay their bills with subscriptions so you can trust they don’t sell or share your info. Free memberships allow you to automatically generate and keep track of multiple emails for privacy and spam filtering purposes in addition to generate and keep track of randomized strong passwords, which can be created for individual websites. It also blocks Web tracking (data collection) and allows auto-fill of their randomized information to make it easier for you to use.
Paid memberships give you the added benefit of “fake” credit cards to keep your purchases anonymous online. The service essentially allows you to instantly generate a digital prepaid (single or multi use) gift card that protects your account information and identity. You can also generate fake phone numbers similar to Google voice and have the option to perform data backups. With all of Blur’s services, you have the option to instantly delete any email, credit card, or number that you think is being abused and create a new one.
SEARCH ENGINES
Part of the reason Google is such a popular and efficient search engine is because it tracks everything anyone does on any of their many platforms. They are able to sell advertisements at a frighteningly accurate rate. This is why you frequently see ads online for something you looked at the week before. Instead consider search engines that don’t track your search history like start page or duck duck go. Start page actually utilizes google to do all of its searches, so you still get great results, but it acts as a screen to prevent data collection. Start page will even act as an intermediary for many websites, protecting your IP address.
VPN Virtual Private Networks (VPNs) are networks that hide your IP address (and therefore your address and identity) while surfing the Internet. It allows you to access the web through servers across the world based on the VPN network you are using, so anyone tracking you online would think you were located in say Cambodia, Turkey, or Germany instead of on your couch in your hometown. It is crucial when looking for a vpn service to understand how they fund their business, there are certain “free” vpns that actually sell your information or your bandwidth. There are many options, but Private Internet Access seems to be the best one around at a decent rate, $3.33 per month for a year subscription on 5 devices, thats enough for a family. All you need to do is activate the vpn on your device, and you can go anywhere online anonymously (until you login to an account, like facebook or amazon, but then you should proceed as discussed earlier). You can easily get around this by buying prepaid gift cards with cash in any store and checking out as a guest, or with the forwarding burner emails.
Next time we’ll discuss how to protect your communications. Do you think any of these are reasonable precautions or just a bunch of paranoid mumbo jumbo?
So February was supposed to be where I learned some automation, but the Raspberry pi platform has been giving me some trouble, so I don’t think I’ll quite have that mastered by the end of the month. I have however started learning a little about cyber security and thought I could share a few easy steps with you to help protect your personal data.
EVEN IF YOU TRUST THEM
Personally, I don’t like anybody knowing any of my personal information, especially the government with their increasing mass surveillance and ever expanding list of laws and regulations. BUT, even for those of you who support the “nothing to hide, nothing to fear” mentality, consider this; you may trust the government, or Target, Home Depot, Amazon, or JP Morgan, to never do anything it wasn’t supposed to, but in the last several years there have been multiple highly publicized hacks of vast amounts of personal data from companies like Home Depot, and the Federal Government. Well-meaning companies, in addition to the government, collect and store vast amounts of data on their users which are prone to security breaches by people who want to steal your SSN or credit card accounts.
Even without worries over security breaches, there is the “creep factor” that companies like Target use their massive stores of data to predict major life events, like a woman’s pregnancy, accurate to within a two week delivery date so she will buy more from Target, before she’s told anyone else, including her parents. Even if you have “nothing to hide”, you wouldn’t want somebody knowing when you go to the bathroom or have an intimate moment with your partner, would you?
WHERE TO START, HOW TO THINK
This is where we get into the basics. Before you start looking for encryption services or apps, the most important thing to consider when implementing privacy online is how they make their money, because nothing is truly free. Even if someone developed a great program or service for free, it still costs money to maintain servers, hard drives, and security to protect it from being hacked. Do you pay for their services, or do they cover costs with grants and donations? If not, then you are their product, not their customer.
Companies like Google and Facebook, which offer services for free to billions of people, need to pay for their infrastructure and employees salaries, even if they were non profit (they aren’t). They do this by collecting absurd amounts of data on their users and selling it as highly specified and highly efficient advertising to other companies (read Target story above). Ever wonder how something you looked at on Amazon shows up on Facebook two weeks later? Now you know. Even if you don’t use security/privacy services, this is an important fact to realize.
BASIC STEPS
Be aware of what photos you post anywhere online, and realize that smart phones and cameras now embed the location the photo was taken into the file. This means someone can extract your home address, where you work, or what gym you go to, even if you go to great lengths to avoid details in your pictures like a street sign or house number.
Whenever possible, pay with cash. I’m guilty of it, I know plastic is easier, but every little purchase you make tells the world where you are at any point in the day, and what you like to buy. It allows strangers to determine your habits, helping them to predict where you are going to be, when you won’t be home, or what you are willing to buy.
A simple yet vastly overlooked non Internet-specific security precaution to consider is telegraphing personal life details in your day-to-day activities. “My child is an honor student” bumper stickers tells strangers where your kid goes to school and approximate age. School/sport team clothing lets strangers know where they can find you. Those stick figure families on the rear car window are excellent for predators assessing the weaknesses of a potential target: single mom or military dad says there likely isn’t an adult male in the house. Kids telegraph the gender and age of the children in the house. No pets mean no animal to alert you of intruders. Kids in sports gear means it’s likely nobody is home in the early afternoons. All they need to do is follow you home.
WHAT NEXT?
This post is more to get you thinking about why you might want to protect your privacy and easy ways to do it. Next time I’ll go into tools and programs you can use to easily increase your security.
Vermicompost, aka composting with worms, is a good option for people on small properties or in apartments, or who can’t get enough material for a proper hot compost. As long as you don’t feed them more than they can eat, it never really stinks, they just turn all your garbage into worm castings (poop) that is super high in nutrients and is arguably more beneficial for plants.
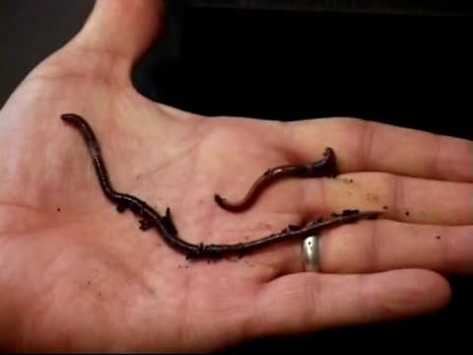
While you can do it on the cheap and dig up worms from your back yard, you’d be better off buying worms specifically bred for it. Your average backyard worm is likely a form of nightcrawler, where what you really want is a red wiggler. Red wigglers don’t really burrow like nightcrawlers, and even though they are smaller, they can eat a lot more; roughly half of their weight each day, which is pretty good.
If you eat lots of fruits and vegetables, worms may be an excellent addition to your home as this is what they eat. They don’t eat dairy or meat, and salty/acidic foods like citrus can burn their mucous-y skin, so avoid them in your worm bin. You can spend a lot of money on a fancy worm get-up, or you can do a little research and make your own from any variety of containers, just make sure it doesn’t let light in, and has a fairly tight but breathable lid. Once you decide to try vermicomposting, go ahead and order your worms, typically 1000 worms per pound. Try to estimate your daily, or weekly non-meat/dairy food waste, and order appropriately; if you think you throw away 5 pounds of veggies, apple cores, mashed potatoes, etc. a week, you would need 10,000 worms to process everything! If that’s too much to handle, you can of course start with a smaller worm bin and try a cold composting system by throwing the extras in a pile in the yard for several months, or just throwing it out. Keep in mind that a healthy worm colony can double in size every 3 months anyway, so you won’t have to worry about buying more to scale up if you do it right (you can always let them go in the garden or yard, or sell your extras if you like the population you have).
Once you have your worms on order, you need to make sure your bin is ready. Worms are mostly water, so they are pretty sensitive to temperature and humidity. Above 85F and they will start to cook, too cold and they will freeze, so you want a nice shaded area for them from spring to fall, and will need somewhere well insulated or bring them inside for the winter. Once worms get started, in addition to making worm castings, they also generate “worm juice”, or a liquid fertilizer as a byproduct of breaking down all of the food scraps. You need to make sure you have an appropriate drain so they don’t drown in it, but can’t escape out through the drain, I have found drilling a few holes in the bottom with a cloth or old pillowcase, etc. as a lining for the entire container to be the easiest method. You’d be amazed at how small of a hole they can fit through, a hole small enough for them to not squeeze through is a hole that will clog up in a few days if it doesn’t have a filter, so just drill a few holes and use a cloth for all of your worms to chill in. You should try to capture the worm juice with a jar under the drain because its an excellent fertilizer to water your plants with.
Their bedding should be always damp like a squeezed out sponge, but never dry and never wet. The easiest way to start a worm bin is to finely shred some paper or junk mail (no shiny stuff) and let it soak in a bucket over night, then squeeze it out and spread it all over your container about an inch or two deep. Remember, red wigglers aren’t burrowers, so deeper isn’t better. Worms always ship dehydrated (they transport better that way), so when you get them you will have instructions on how to rehydrate them and introduce them to their new home. BE WARNED, they will be pissed, and do anything they can to escape within the first day. A window screen won’t work, a sealable lid won’t work unless it has some sort of o-ring or gasket, but that shouldn’t be permanent anyway because you will suffocate them. The only thing I’ve found to work is another piece of cloth rubber-banded around the lid. Once your worms settle, you may or may not need a lid anymore, and can feed them scraps proportionate to how many worms you have, 1/2 lb per 1000 worms per day (on average, you can do more every other day, or a lot more once per week). This isn’t really a hard number, just keep a nose out for any funky smells, or of the food starts building up. You can mitigate this by burying the fresh scraps under the existing bedding or adding a thin layer of fresh bedding.
Let’s talk basic maintenance and trouble shooting. If your pile is too dry, give it a quick spray. If it’s too wet, your drain may be clogged, or there may be too much stuff in there; if you can’t sort it out easily, transfer them to fresh (dry bedding) to absorb that moisture and try to clear those drains. Make sure the temperature is right and they are out of the sun to keep them happy. Don’t overfeed them, and don’t underfeed them or they will try to leave.
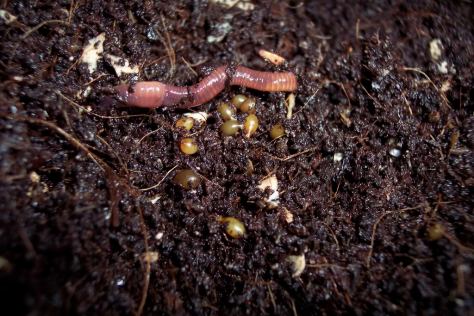
If you’re doing everything right and they are happy, they may disappear to the bottom of the bin for a big writhing worm orgy. After that happens you should start to see amber colored capsules the size of a grain of rice. These are worm cocoons and means your worm empire is growing!
After it seems like most of their bedding has been eaten and most of the bin is starting to look pretty dark with worm castings, it’s time to harvest. Stop feeding them for a few days until most of the food scraps are gone. Then you can either dump them on a tarp and manually sort the worms out into a new bin, which is more time intensive and much grosser, or you can have them move out on their own. Push everything to one side of the container and put fresh bedding on the other side. Start feeding them on the clean side of the worm bin, and they will naturally start migrating toward the food, making harvesting the worm castings much easier.
There really aren’t that many excuses not to do it. They don’t take a lot of work they multiply like crazy, they eat your garbage, and give you natural organic-quality fertilizer for all their hard work. You should try it!