
Vermicompost, aka composting with worms, is a good option for people on small properties or in apartments, or who can’t get enough material for a proper hot compost. As long as you don’t feed them more than they can eat, it never really stinks, they just turn all your garbage into worm castings (poop) that is super high in nutrients and is arguably more beneficial for plants.
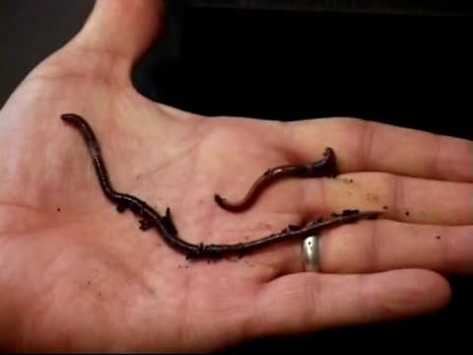
While you can do it on the cheap and dig up worms from your back yard, you’d be better off buying worms specifically bred for it. Your average backyard worm is likely a form of nightcrawler, where what you really want is a red wiggler. Red wigglers don’t really burrow like nightcrawlers, and even though they are smaller, they can eat a lot more; roughly half of their weight each day, which is pretty good.
If you eat lots of fruits and vegetables, worms may be an excellent addition to your home as this is what they eat. They don’t eat dairy or meat, and salty/acidic foods like citrus can burn their mucous-y skin, so avoid them in your worm bin. You can spend a lot of money on a fancy worm get-up, or you can do a little research and make your own from any variety of containers, just make sure it doesn’t let light in, and has a fairly tight but breathable lid. Once you decide to try vermicomposting, go ahead and order your worms, typically 1000 worms per pound. Try to estimate your daily, or weekly non-meat/dairy food waste, and order appropriately; if you think you throw away 5 pounds of veggies, apple cores, mashed potatoes, etc. a week, you would need 10,000 worms to process everything! If that’s too much to handle, you can of course start with a smaller worm bin and try a cold composting system by throwing the extras in a pile in the yard for several months, or just throwing it out. Keep in mind that a healthy worm colony can double in size every 3 months anyway, so you won’t have to worry about buying more to scale up if you do it right (you can always let them go in the garden or yard, or sell your extras if you like the population you have).
Once you have your worms on order, you need to make sure your bin is ready. Worms are mostly water, so they are pretty sensitive to temperature and humidity. Above 85F and they will start to cook, too cold and they will freeze, so you want a nice shaded area for them from spring to fall, and will need somewhere well insulated or bring them inside for the winter. Once worms get started, in addition to making worm castings, they also generate “worm juice”, or a liquid fertilizer as a byproduct of breaking down all of the food scraps. You need to make sure you have an appropriate drain so they don’t drown in it, but can’t escape out through the drain, I have found drilling a few holes in the bottom with a cloth or old pillowcase, etc. as a lining for the entire container to be the easiest method. You’d be amazed at how small of a hole they can fit through, a hole small enough for them to not squeeze through is a hole that will clog up in a few days if it doesn’t have a filter, so just drill a few holes and use a cloth for all of your worms to chill in. You should try to capture the worm juice with a jar under the drain because its an excellent fertilizer to water your plants with.
Their bedding should be always damp like a squeezed out sponge, but never dry and never wet. The easiest way to start a worm bin is to finely shred some paper or junk mail (no shiny stuff) and let it soak in a bucket over night, then squeeze it out and spread it all over your container about an inch or two deep. Remember, red wigglers aren’t burrowers, so deeper isn’t better. Worms always ship dehydrated (they transport better that way), so when you get them you will have instructions on how to rehydrate them and introduce them to their new home. BE WARNED, they will be pissed, and do anything they can to escape within the first day. A window screen won’t work, a sealable lid won’t work unless it has some sort of o-ring or gasket, but that shouldn’t be permanent anyway because you will suffocate them. The only thing I’ve found to work is another piece of cloth rubber-banded around the lid. Once your worms settle, you may or may not need a lid anymore, and can feed them scraps proportionate to how many worms you have, 1/2 lb per 1000 worms per day (on average, you can do more every other day, or a lot more once per week). This isn’t really a hard number, just keep a nose out for any funky smells, or of the food starts building up. You can mitigate this by burying the fresh scraps under the existing bedding or adding a thin layer of fresh bedding.
Let’s talk basic maintenance and trouble shooting. If your pile is too dry, give it a quick spray. If it’s too wet, your drain may be clogged, or there may be too much stuff in there; if you can’t sort it out easily, transfer them to fresh (dry bedding) to absorb that moisture and try to clear those drains. Make sure the temperature is right and they are out of the sun to keep them happy. Don’t overfeed them, and don’t underfeed them or they will try to leave.
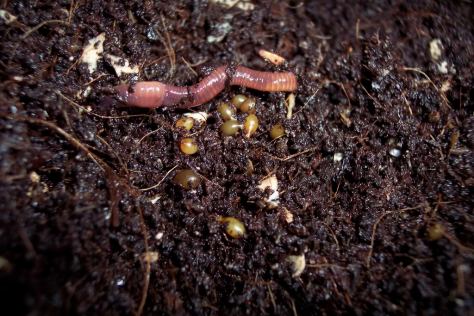
If you’re doing everything right and they are happy, they may disappear to the bottom of the bin for a big writhing worm orgy. After that happens you should start to see amber colored capsules the size of a grain of rice. These are worm cocoons and means your worm empire is growing!
After it seems like most of their bedding has been eaten and most of the bin is starting to look pretty dark with worm castings, it’s time to harvest. Stop feeding them for a few days until most of the food scraps are gone. Then you can either dump them on a tarp and manually sort the worms out into a new bin, which is more time intensive and much grosser, or you can have them move out on their own. Push everything to one side of the container and put fresh bedding on the other side. Start feeding them on the clean side of the worm bin, and they will naturally start migrating toward the food, making harvesting the worm castings much easier.
There really aren’t that many excuses not to do it. They don’t take a lot of work they multiply like crazy, they eat your garbage, and give you natural organic-quality fertilizer for all their hard work. You should try it!

2 thoughts on “Composting – with Worms”