With this blog series, I am going to share my journey of building my own root cellar with everyone and hopefully inspire somebody to do the same.
We’ve talked about being self reliant and keeping a well stocked pantry for storing large amounts of food in the event of an emergency, whether it’s a financial/economic slump, a weather storm, or the end of the world. Food that isn’t shelf stable typically requires special storage considerations, but it isn’t always practical or affordable to have three freezers or refrigerators. Instead, the tried and true method of root cellaring can be utilized.
The basic necessities (which coincidentally are how your fridge and freezer also preserve food) are cold and dark. A root cellar usually can’t get as cold as either, but it makes up for it with the third important factor that a fridge and freezer lack, air flow.
They can be as large and complex as standalone buried bunkers, an insulated closet or corner basement room, or as simple and inexpensive as a buried cooler or broken fridge .
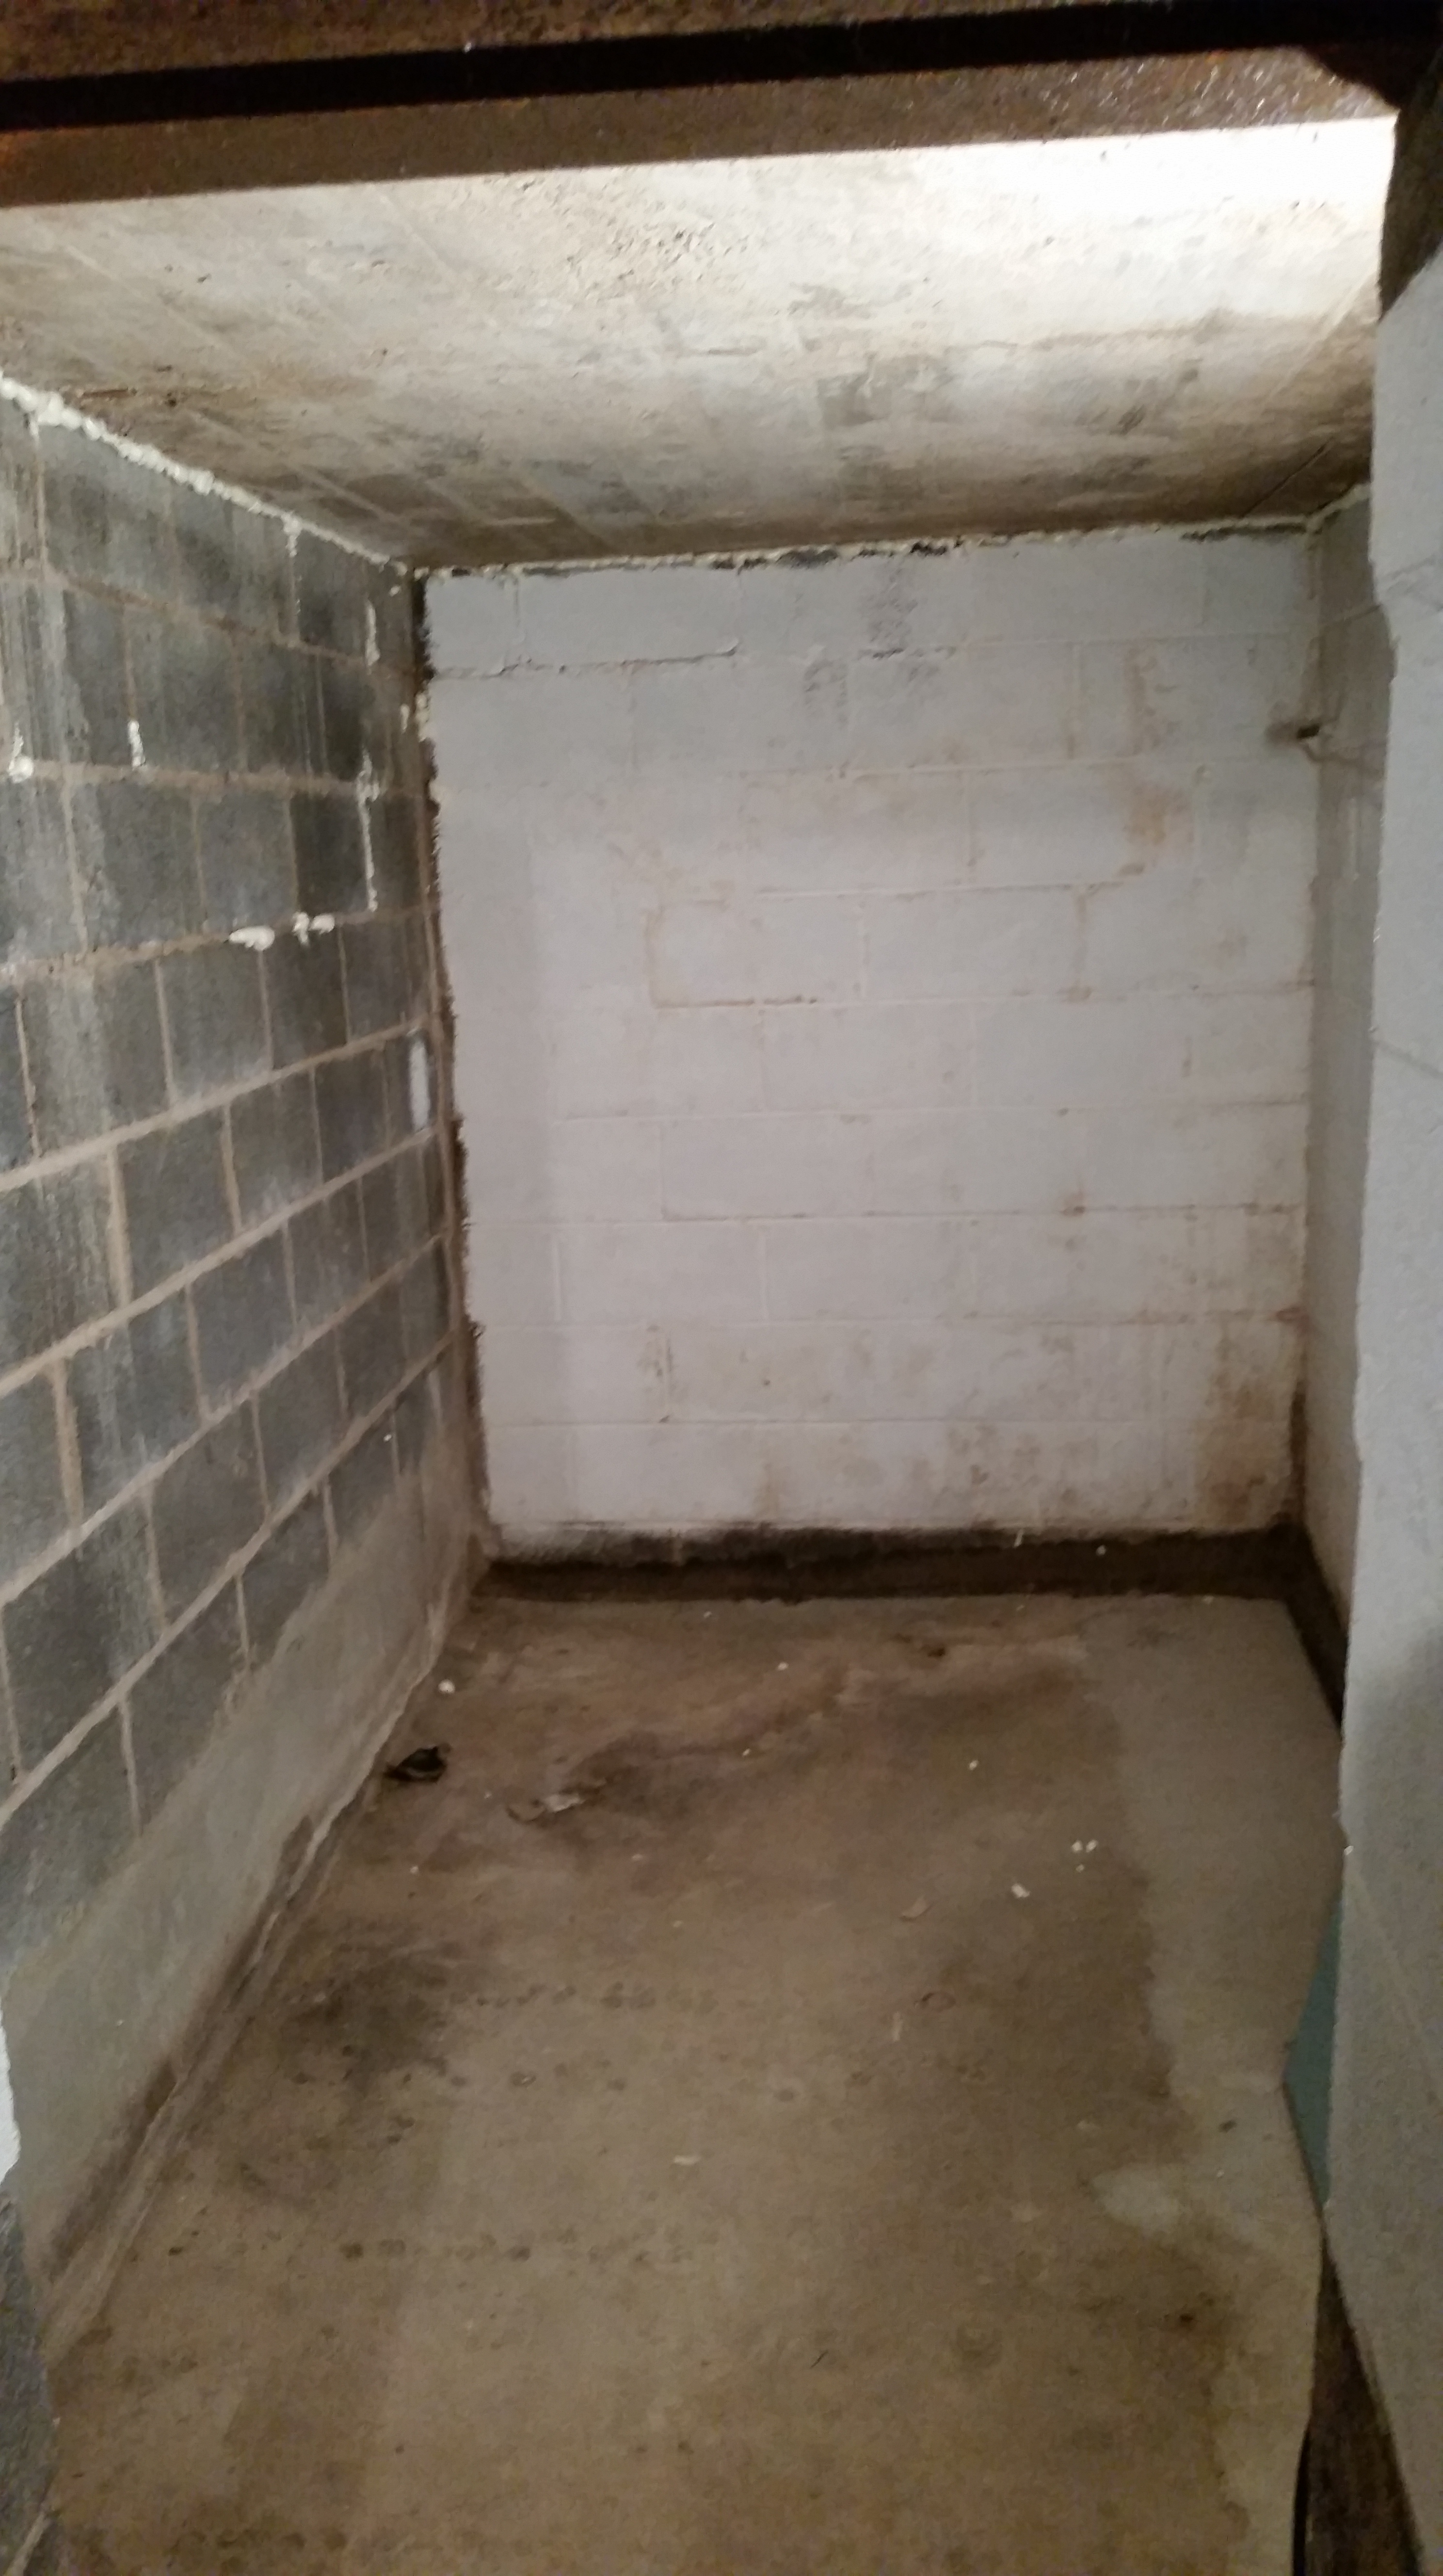
I happen to be lucky enough to have an isolated corner room in my basement where the oil tank used to be. This will naturally stay nice and cold through the winter and require minimal extra insulating.
The cellar’s humble beginnings
You might be able to see that the room already has a french drain to help divert moisture from the walls to the sump pump. This can be a blessing if properly managed because produce requires a certain level of humidity, but I’m going to seal the walls anyway.
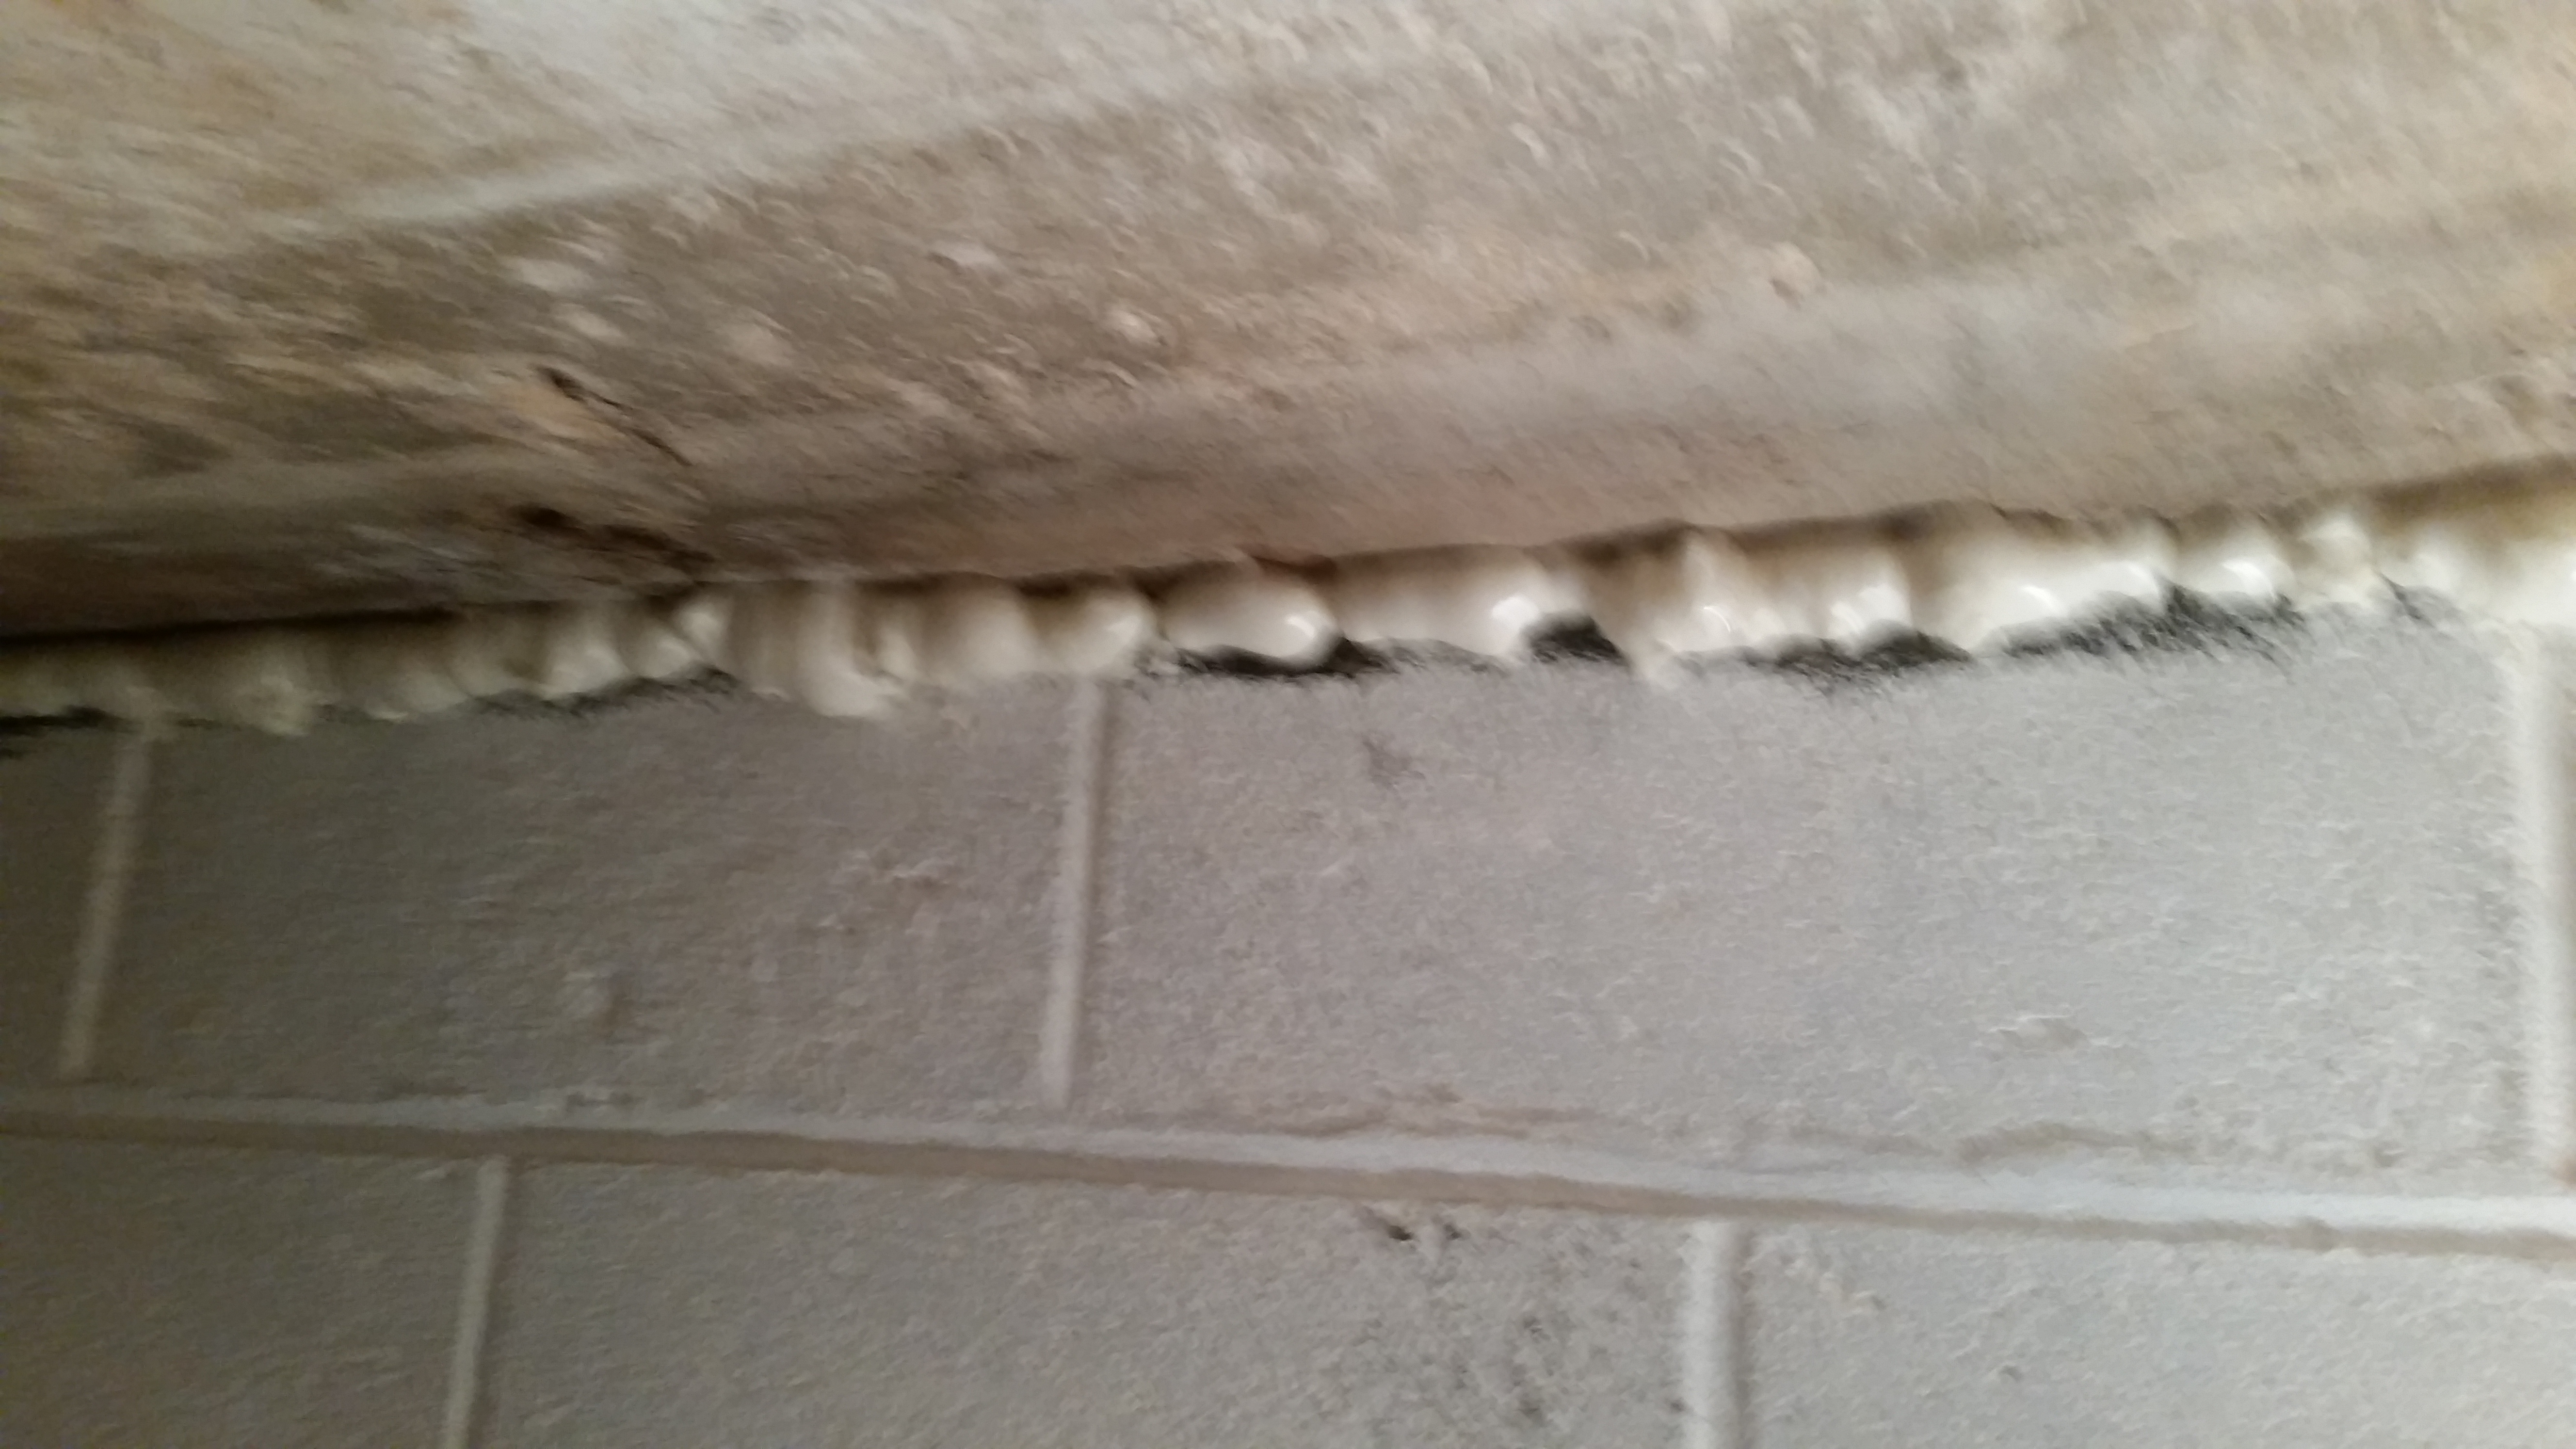
My first step however, is to completely clean it out. That includes sweeping every square inch to get rid of the dust and spiders (a necessity if lady Tinker is going to eat anything stored down here). I also got a few cans of spray foam to seal the bigger cracks to help insulate the room and prevent the bugs from returning.
Seal all of the cracks
Next time I check in, I’ll be waterproof painting the walls and ceiling to help keep it clean and prevent bugs from sneaking back in.
So last week I talked about why you should consider taking steps to protect yourself online, and now I’ll discuss options on HOW to protect yourself online. Basic practices, like discussed earlier, include being careful of what you share online like pictures and stories on social media. Be aware of any information you might be accidentally giving away.
PSEUDONYMS
Some of the easiest practices are to use (partially) fake names or email addresses for services that require information for marketing purposes, or “verifying your age”. Free services often sell this information to others for advertising to pay their bills. You can use your middle name or nickname, and anyone looking specifically for you will skip right by your info, and anyone trying to steal your identity will have mis-matching information. Having and using fake email accounts that auto-forward to your real email allow you to kill the spam flood once you realize someone has been sharing your info without having to lose your real email address. This can be done manually by creating alternate emails that auto-forward, or with services like junkmail.com or premium services like Blur.
BLUR Blur is a service that is dedicated to its customers’ privacy and anonymity. They pay their bills with subscriptions so you can trust they don’t sell or share your info. Free memberships allow you to automatically generate and keep track of multiple emails for privacy and spam filtering purposes in addition to generate and keep track of randomized strong passwords, which can be created for individual websites. It also blocks Web tracking (data collection) and allows auto-fill of their randomized information to make it easier for you to use.
Paid memberships give you the added benefit of “fake” credit cards to keep your purchases anonymous online. The service essentially allows you to instantly generate a digital prepaid (single or multi use) gift card that protects your account information and identity. You can also generate fake phone numbers similar to Google voice and have the option to perform data backups. With all of Blur’s services, you have the option to instantly delete any email, credit card, or number that you think is being abused and create a new one.
SEARCH ENGINES
Part of the reason Google is such a popular and efficient search engine is because it tracks everything anyone does on any of their many platforms. They are able to sell advertisements at a frighteningly accurate rate. This is why you frequently see ads online for something you looked at the week before. Instead consider search engines that don’t track your search history like start page or duck duck go. Start page actually utilizes google to do all of its searches, so you still get great results, but it acts as a screen to prevent data collection. Start page will even act as an intermediary for many websites, protecting your IP address.
VPN Virtual Private Networks (VPNs) are networks that hide your IP address (and therefore your address and identity) while surfing the Internet. It allows you to access the web through servers across the world based on the VPN network you are using, so anyone tracking you online would think you were located in say Cambodia, Turkey, or Germany instead of on your couch in your hometown. It is crucial when looking for a vpn service to understand how they fund their business, there are certain “free” vpns that actually sell your information or your bandwidth. There are many options, but Private Internet Access seems to be the best one around at a decent rate, $3.33 per month for a year subscription on 5 devices, thats enough for a family. All you need to do is activate the vpn on your device, and you can go anywhere online anonymously (until you login to an account, like facebook or amazon, but then you should proceed as discussed earlier). You can easily get around this by buying prepaid gift cards with cash in any store and checking out as a guest, or with the forwarding burner emails.
Next time we’ll discuss how to protect your communications. Do you think any of these are reasonable precautions or just a bunch of paranoid mumbo jumbo?
So February was supposed to be where I learned some automation, but the Raspberry pi platform has been giving me some trouble, so I don’t think I’ll quite have that mastered by the end of the month. I have however started learning a little about cyber security and thought I could share a few easy steps with you to help protect your personal data.
EVEN IF YOU TRUST THEM
Personally, I don’t like anybody knowing any of my personal information, especially the government with their increasing mass surveillance and ever expanding list of laws and regulations. BUT, even for those of you who support the “nothing to hide, nothing to fear” mentality, consider this; you may trust the government, or Target, Home Depot, Amazon, or JP Morgan, to never do anything it wasn’t supposed to, but in the last several years there have been multiple highly publicized hacks of vast amounts of personal data from companies like Home Depot, and the Federal Government. Well-meaning companies, in addition to the government, collect and store vast amounts of data on their users which are prone to security breaches by people who want to steal your SSN or credit card accounts.
Even without worries over security breaches, there is the “creep factor” that companies like Target use their massive stores of data to predict major life events, like a woman’s pregnancy, accurate to within a two week delivery date so she will buy more from Target, before she’s told anyone else, including her parents. Even if you have “nothing to hide”, you wouldn’t want somebody knowing when you go to the bathroom or have an intimate moment with your partner, would you?
WHERE TO START, HOW TO THINK
This is where we get into the basics. Before you start looking for encryption services or apps, the most important thing to consider when implementing privacy online is how they make their money, because nothing is truly free. Even if someone developed a great program or service for free, it still costs money to maintain servers, hard drives, and security to protect it from being hacked. Do you pay for their services, or do they cover costs with grants and donations? If not, then you are their product, not their customer.
Companies like Google and Facebook, which offer services for free to billions of people, need to pay for their infrastructure and employees salaries, even if they were non profit (they aren’t). They do this by collecting absurd amounts of data on their users and selling it as highly specified and highly efficient advertising to other companies (read Target story above). Ever wonder how something you looked at on Amazon shows up on Facebook two weeks later? Now you know. Even if you don’t use security/privacy services, this is an important fact to realize.
BASIC STEPS
Be aware of what photos you post anywhere online, and realize that smart phones and cameras now embed the location the photo was taken into the file. This means someone can extract your home address, where you work, or what gym you go to, even if you go to great lengths to avoid details in your pictures like a street sign or house number.
Whenever possible, pay with cash. I’m guilty of it, I know plastic is easier, but every little purchase you make tells the world where you are at any point in the day, and what you like to buy. It allows strangers to determine your habits, helping them to predict where you are going to be, when you won’t be home, or what you are willing to buy.
A simple yet vastly overlooked non Internet-specific security precaution to consider is telegraphing personal life details in your day-to-day activities. “My child is an honor student” bumper stickers tells strangers where your kid goes to school and approximate age. School/sport team clothing lets strangers know where they can find you. Those stick figure families on the rear car window are excellent for predators assessing the weaknesses of a potential target: single mom or military dad says there likely isn’t an adult male in the house. Kids telegraph the gender and age of the children in the house. No pets mean no animal to alert you of intruders. Kids in sports gear means it’s likely nobody is home in the early afternoons. All they need to do is follow you home.
WHAT NEXT?
This post is more to get you thinking about why you might want to protect your privacy and easy ways to do it. Next time I’ll go into tools and programs you can use to easily increase your security.
Vermicompost, aka composting with worms, is a good option for people on small properties or in apartments, or who can’t get enough material for a proper hot compost. As long as you don’t feed them more than they can eat, it never really stinks, they just turn all your garbage into worm castings (poop) that is super high in nutrients and is arguably more beneficial for plants.
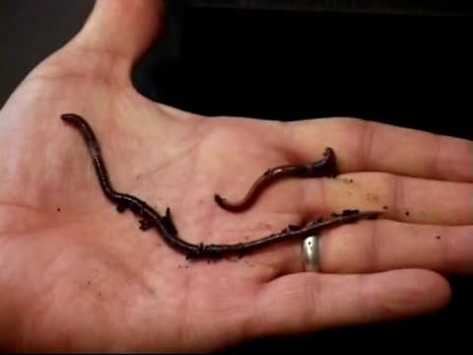
While you can do it on the cheap and dig up worms from your back yard, you’d be better off buying worms specifically bred for it. Your average backyard worm is likely a form of nightcrawler, where what you really want is a red wiggler. Red wigglers don’t really burrow like nightcrawlers, and even though they are smaller, they can eat a lot more; roughly half of their weight each day, which is pretty good.
If you eat lots of fruits and vegetables, worms may be an excellent addition to your home as this is what they eat. They don’t eat dairy or meat, and salty/acidic foods like citrus can burn their mucous-y skin, so avoid them in your worm bin. You can spend a lot of money on a fancy worm get-up, or you can do a little research and make your own from any variety of containers, just make sure it doesn’t let light in, and has a fairly tight but breathable lid. Once you decide to try vermicomposting, go ahead and order your worms, typically 1000 worms per pound. Try to estimate your daily, or weekly non-meat/dairy food waste, and order appropriately; if you think you throw away 5 pounds of veggies, apple cores, mashed potatoes, etc. a week, you would need 10,000 worms to process everything! If that’s too much to handle, you can of course start with a smaller worm bin and try a cold composting system by throwing the extras in a pile in the yard for several months, or just throwing it out. Keep in mind that a healthy worm colony can double in size every 3 months anyway, so you won’t have to worry about buying more to scale up if you do it right (you can always let them go in the garden or yard, or sell your extras if you like the population you have).
Once you have your worms on order, you need to make sure your bin is ready. Worms are mostly water, so they are pretty sensitive to temperature and humidity. Above 85F and they will start to cook, too cold and they will freeze, so you want a nice shaded area for them from spring to fall, and will need somewhere well insulated or bring them inside for the winter. Once worms get started, in addition to making worm castings, they also generate “worm juice”, or a liquid fertilizer as a byproduct of breaking down all of the food scraps. You need to make sure you have an appropriate drain so they don’t drown in it, but can’t escape out through the drain, I have found drilling a few holes in the bottom with a cloth or old pillowcase, etc. as a lining for the entire container to be the easiest method. You’d be amazed at how small of a hole they can fit through, a hole small enough for them to not squeeze through is a hole that will clog up in a few days if it doesn’t have a filter, so just drill a few holes and use a cloth for all of your worms to chill in. You should try to capture the worm juice with a jar under the drain because its an excellent fertilizer to water your plants with.
Their bedding should be always damp like a squeezed out sponge, but never dry and never wet. The easiest way to start a worm bin is to finely shred some paper or junk mail (no shiny stuff) and let it soak in a bucket over night, then squeeze it out and spread it all over your container about an inch or two deep. Remember, red wigglers aren’t burrowers, so deeper isn’t better. Worms always ship dehydrated (they transport better that way), so when you get them you will have instructions on how to rehydrate them and introduce them to their new home. BE WARNED, they will be pissed, and do anything they can to escape within the first day. A window screen won’t work, a sealable lid won’t work unless it has some sort of o-ring or gasket, but that shouldn’t be permanent anyway because you will suffocate them. The only thing I’ve found to work is another piece of cloth rubber-banded around the lid. Once your worms settle, you may or may not need a lid anymore, and can feed them scraps proportionate to how many worms you have, 1/2 lb per 1000 worms per day (on average, you can do more every other day, or a lot more once per week). This isn’t really a hard number, just keep a nose out for any funky smells, or of the food starts building up. You can mitigate this by burying the fresh scraps under the existing bedding or adding a thin layer of fresh bedding.
Let’s talk basic maintenance and trouble shooting. If your pile is too dry, give it a quick spray. If it’s too wet, your drain may be clogged, or there may be too much stuff in there; if you can’t sort it out easily, transfer them to fresh (dry bedding) to absorb that moisture and try to clear those drains. Make sure the temperature is right and they are out of the sun to keep them happy. Don’t overfeed them, and don’t underfeed them or they will try to leave.
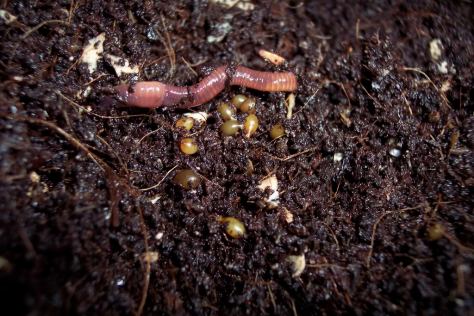
If you’re doing everything right and they are happy, they may disappear to the bottom of the bin for a big writhing worm orgy. After that happens you should start to see amber colored capsules the size of a grain of rice. These are worm cocoons and means your worm empire is growing!
After it seems like most of their bedding has been eaten and most of the bin is starting to look pretty dark with worm castings, it’s time to harvest. Stop feeding them for a few days until most of the food scraps are gone. Then you can either dump them on a tarp and manually sort the worms out into a new bin, which is more time intensive and much grosser, or you can have them move out on their own. Push everything to one side of the container and put fresh bedding on the other side. Start feeding them on the clean side of the worm bin, and they will naturally start migrating toward the food, making harvesting the worm castings much easier.
There really aren’t that many excuses not to do it. They don’t take a lot of work they multiply like crazy, they eat your garbage, and give you natural organic-quality fertilizer for all their hard work. You should try it!
The benefits of Fluoride, detergents, and abrasives in toothpaste can be debatable depending on where you look, although most people say it’s fine, or beneficial for you. I’m no expert, but I do like to know what I’m putting in my body when I can help it, so I made a point of finding a toothpaste recipe that worked well for me. It discusses many of the common ingredients in commercial and DIY toothpastes, and potential risks, benefits, or harms.
After the bit of research I’ve done, I’ve come to conclude that while baking soda may not necessarily be bad, I don’t want to take the chance of it wearing down my enamel since I already have sensitive teeth at times. I’ll stick with the finer bentonite clay and sea salt, which is ‘gentle’ enough to dissolve as you brush. Coconut oil has many beneficial properties as an anti bacterial and anti fungal, in addition to having lots of vitamin E.
Home Made Toothpaste recipe:
2tbsp coconut oil
2tbsp bentonite clay
1/4 tsp fine sea salt
1-2 tsp water
essential oil to taste
Start with the coconut oil, then add in the bentonite and salt ontop, and do your best to mash it with a spoon until it is a uniform consistency. Add a little water as necessary until it is at your preferred thickness. Note that coconut oil goes from solid to liquid in a warm room, so it may be much thinner if you don’t keep the AC on in the summer or like your bathroom as a sauna. Once you get the consistency right, add essential oil to taste. For a batch of this size, 5-10 drops should be enough. Good default flavors will be any variety of mint, or cinnamon, but you can get creative with a sweet orange, basil, lavender, rosemary, etc.
As a bonus, you can add activated charcoal to your toothpaste. Activated charcoal is known for pulling colors out of things, so it is a natural teeth whitener (you can brush just with activated charcoal as a whitening treatment if you want). The easiest way to get some is to go to your local pharmacy store and buy a bottle of activated charcoal in pill form, it is commonly used to settle stomachs as it is a good absorbent. Just add half of a pill to your toothpaste, or use half a pill on your toothbrush as a tooth whitening treatment. Just make sure you do a good job of rinsing it down the drain as it is very obvious if you let it sit in the bowl (it’s black).
With the potential for a good snowfall this coming weekend along the northeast coast, I’m going to talk about some of the basics of food preparedness. I’m not talking about spending $3000 on a pallet of MREs or ten years of freeze dried food. I’m talking about a comprehensive, balanced, well-stocked pantry. When done from end-of-the-world paranoia, people will call you a hoarder, tin-hat conspiracy theorist, or any other number of names. But there are several very valid reasons to maintain a well stocked pantry, especially considering the average household only has three days worth of food in their house (I read somewhere but can’t find the proof). As a matter of fact, several decades ago it was considered a normal part of life for our grandparents. Anyone without a pantry was considered to be either irresponsible, or too poor off to be able to afford it, warranting charity from their neighbors to help them out.
The three easiest reasons to win someone over are economic, convenience, and resilience. There are a few basic investing principles like dollar-cost-averaging and capital deferral that make a case for storing food. Shelf stable foods, if bought in bulk when on sale, will save you money in the future if you instead had to buy it at the higher price later because you didn’t already have it. It’s very convenient and easy to have a high quality meal when you already have a large variety of prepared food in the house, instead of opening the fridge realizing there is nothing worth eating, and having to go out to eat (spending more money) because you don’t have the time to cook from scratch. There is also a very strong case for resilience and reduced stress; imagine someone in your family gets laid off (much more likely than a nuclear apocalypse, right?). Yea i know, “but that’s what unemployment is for”. Well, unemployment is a lot less than your regular paycheck, and if you were already living paycheck, to paycheck,worrying about making sure there is food on the table can be very stressful. It can lead to poor health, or making hasty decisions, like accepting the first job you can find, instead of the right job or a good paying job.
The easiest and most affordable way to begin stocking a pantry is to start a food journal. Get a piece of paper and pen and leave it in the kitchen. Everytime someone eats something, in the house or out and about, add it to the journal for that day. After a few weeks, put stars next to the things that was eaten freuently, and a double star if that thing can be easily stored (like canned tuna, a box of mac and cheese, ice cream, etc.). These are the things you eat REGULARLY and know that if you had a larger quantity of it, you would eat it all before it went bad. The next step is a simple process called copy-canning. If you can’t afford to go spend 500 dollars on food to stock up on these new-found staples for your household, instead focus on one or two items at a time. Each time you eat one can/box/etc of that item, add two cans/boxes/etc of that item to your shopping list. Repeat the process until you slowly develop a stockpile that will last you three months, then move onto another set of food items. Note, that this does not mean three months of eating nothing but mac and cheese, but rather three months worth of eating that thing at the rate you normally eat it. So if you ate mac and cheese once a week, you should copy-can your mac and cheese until you have twelve boxes(12 weeks/3 months).
The other easy opportunities to build your pantry is for bulk or opportunity buys. It is important to remember your food journal. DO NOT buy 50 cans of mushrooms because they are on super-sale if you hate mushrooms, this is akin to buying $3000 dollars worth of MREs just so you have food in an emergency, you want to eat something you like in a stressful emergency, not a can of slippery and slimy mushrooms. That being said, wholesale clubs like Costco, BJs, Sams Club, etc. are great resources for buying items in bulk that last a long time like rice and beans, or bulk packages that can go in the freezer. 5 gallon buckets with gamma lids are great resources for shelf-stable bulk items like flour, sugar, and rice. The opportunity buy are those super deals like the can-can sale at Shop Rite. I might get funny looks at the checkout, or an exasperated sigh from Lady Tinker, but buying $300 worth of soup and canned vegetables at half price just saved us $300 later this year. This food is shelf stable for one to two years, so as long as I don’t buy more than we will eat in a year, it is money well spent and money saved.
Your pantry doesn’t need to be an entire dedicated room like mine is, most people don’t have that much extra space. You can start with a spare closet, a few tupperware bins under the bed, ontop of the kitchen cabinets, or anywhere with some free space. Any little bit helps. The only other important point I will address here is to keep an organized and inventoried pantry. This includes your freezer, if you have an extra one (especially the chest freezers). You need to know what you have and where it is, or you will forget you have it it until you smell it starting to go bad.
Have I convinced you? Will you consider starting a pantry? Let me know.
So, It’s January, and it finally started getting cold. I probably should have mentioned that below freezing isn’t exactly the best time to start composting, but here we are. Composting is at the most basic level the art of making things rot in such a way that it smells as little as possible, using aerobic bacteria, beneficial microorganisms, and critters like pill bugs and worms, to make a biologically diverse, nutrient rich soil (aka humus) that is like crack for plants.
The bacteria that do most of the work like it hot and damp, and a healthy compost pile should be around 130-160F with the moisture consistency of a wrung-out sponge. If the temperature is too low, you might have too much carbon, and a quick fix for that is to pee on it for a few days to up the nitrogen! This can also be affected by the amount of material you have in your pile, too much and the pile can collapse under its own weight, suffocating the aerobic bacteria that are working so hard for you. If your pile is too small, there won’t be enough material to allow it to get up to temperature and support the critters chewing it up. The universal standard is one cubic meter, or just over 3 feet cubed (trust me, it’s about ten times the amount of material you think it is). There are complex, expensive machines that are supposed to make smaller amounts work, but I’m going to need the material for my garden anyway, and I don’t want to spend $100+ on something that three recycled pallets and a pitchfork can do just as well.
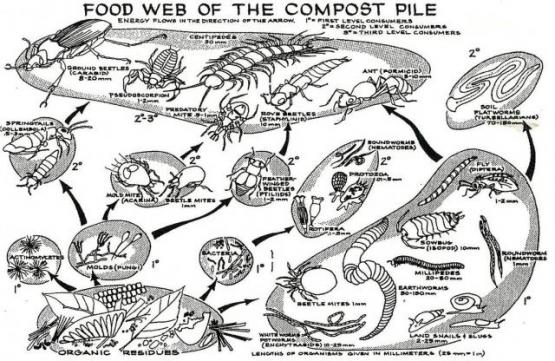
The general rule of thumb is that you want a ratio of 30 carbon to 1 nitrogen for the ideal mixture to allow it to break down quickly without starting to reek. Carbons are your “browns”, basically anything dead or woody like mulch, fallen leaves, straw, cardboard, newspaper, sawdust, etc. Nitrogens are your “greens” like vegetable and fruit scraps, leafy plant trimmings, weeds (before they flower/seed or you will get weeds everywhere next year!!), and even coffee grounds. Animal manure, seaweed, blood(meal), and urine are among the lowest c:n ratios (most nitrogen). Here is a website with a good starting list of c:n ratios. Too high of a carbon ratio and your compost pile will take very long to break down, but if your ratio is too low (too much nitrogen) your pile will get all slimy and stinky, which also means it’s unhealthy. Many people say meats, dairy, and oils are forbidden in compost piles, but I think thats more for pest management than it actually doing any damage to your pile, since they all break down the same. My philosophy is, a little bit never hurt anybody, so I’m not going to worry about a little meat or dairy in my pile unless it starts to smell. If I happen to feed a few of the local critters, they’ll only turn the pile a little for me, until the Furry Tinkerer chases them off. (Side note, I know she’ll keep the garden largely pest free for me this summer, she always chases off the squirrels and already caught a rabbit in the back yard).
Composting can be very complicated if you get into higher level science, tweaking the microbiology can yield customized composts designed to benefit specific products such as strawberries or tomatoes. But for the beginner, there are two basic approaches. The first is the ‘set it and forget it’ approach, where you gather all of your material, wet it down, mix it up, and leave it alone for a few months, checking on it occasionally to fix any problems if it starts to dry out, cool off, overheat, etc.
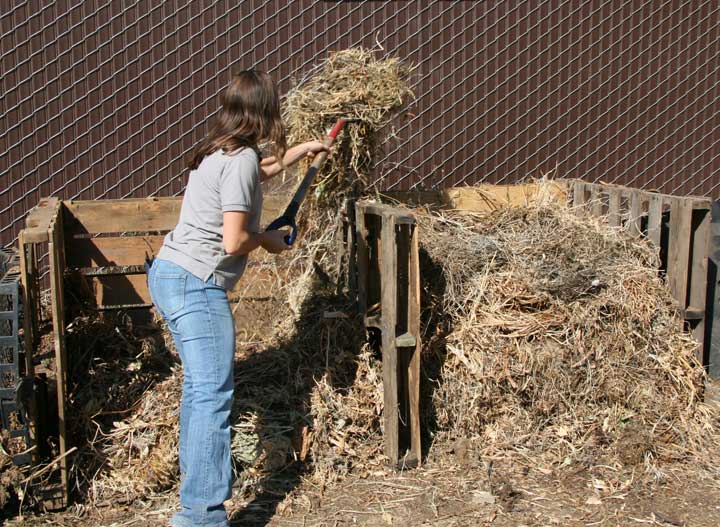
Not me, or my picture, but a good illustration of two stalls needed for turning compost.
The other popular beginner method is the Berkeley Method. Here you can get a completed compost pile in 18 days, but it takes a lot of work with a pitchfork. On Day 1 you stack your pile and wet it down so it is slightly damp throughout. Then you leave it alone for the microbes to colonize the pile and start to heat it up. On the fourth day, you get your pitchfork and invert the pile, taking everything from the outer layers and put it in the middle (you will need a second compost area) and stacking the center of the old pile onto the outside of the new one. Check for moisture and water if necessary. You repeat this every other day until you hit 18 days, for a total of 8 turns, or roughly 4 hours of work. That seems like a lot of work, but you condense 6-12 months of waiting into 18 days.
So, I’ve started collecting material for my pile, and like I said it’s a lot more than you think it would be. To get enough for more than one pile before I need it this spring, I’ve started handing out buckets at work to collect peoples’ food scraps, I hit up the local horse stable occasionally for some nice aged manure, and save all my own food scraps of course. I’m going to be contacting a local lunch shop to see if I can’t get their food scraps to kick my composting into overdrive, and I’ll have to tarp the pile to help keep it warm in this weather.
Have you ever composted before? Try it! I’ve already impressed Lady Tinkerer and my parents with how little a yard full of aged horse manure can smell, compost is nothing compared to that.
So, I recently let everyone know what I’ve been up to in the last year. Now I’m going to give you an overview of my goals for this year. Everyone makes New Years resolutions, typically unrealistic ones, typically ones that never stick. This year I am committed to learning at least 12 skills that will further my independence or the resiliency of my way of life, and I will go over them here with you briefly.
January
Composting:
technically I started in November, but it was mostly research and I only really used horse manure from my local stable and shredded paper from work. Good, high quality compost has many varieties in its materials. Plus this year I’ve started recruiting minions to help me with the compost, so I consider my Composting lesson to start in earnest this month.
February
Automation:
Everyone likes their lives to be a little easier. Everywhere you turn, there are things being automated. There are “smart” thermostats like the Nest, companies like Verizon allow you to turn off your lights or lock your doors from your phone around the globe. That’s great, but it’s expensive! I’m going to learn some easy, affordable DIY automation with products like arduino and raspberry pi.
March
Gardening:
Technically this one could be considered a cheat, as I have tried gardening before, but this will be the first time with my own true garden, where I will be planning far in advance and can implement all the natural solutions/strategies without following any one else’s restrictions for a conventional garden. I’ll also be able to utilize what I learned about automation to keep my garden alive while I’m gone in April.
April
Jerky (bonus yogurt and cheese):
I will be away for half the month getting married, so this month needs to be an easy one. Everywhere I read Jerky is supposed to be easy, and it enhances your options to store food, so I’m going to give it a try. In the theme with preserving perishable foods, I’ll also give cheese/yogurt making a try if I have the time. This is a bonus, just to see if I can.
May
Quail:
Fresh eggs! I live on ~1/8 acre just outside a major city, so the department of making you sad says it’s illegal to raise a chicken unless you have 5 acres (i.e. its illegal period). Well, quail are much smaller, quieter, and are more efficient at converting feed into eggs and meat, so that’s what I’m gonna do (shhh).
June
Bread making (bonus root cellar):
Lady Tinker has celiac, so we are a GF household (I think it’s a healthier option anyway). Gluten free products, while available, are expensive! So I’m determined to cut our costs by experimenting with baking until we can make our own gf foods.
I’m also determined to convert the old coal chute/room in the basement into a root cellar to prepare for all the extra food come fall. This one is also a bonus.
July
Home health products:
A sort-of cheat, as I already make some of my own products. However my goal here is to make them a normal part of the Tinker household and to expand into natural cleaning products and other hygiene/healthcare related stuff.
August
Fermenting:
All of the produce from the garden will start coming in, so there will be to much to eat. There’s only so much that can fit in the freezer, and I don’t particularly enjoy canning, so the next option is fermenting (aka pickling). This increases the shelf life of most foods by several months at least, while maintaining its crispness and providing a level of probiotics to your diet for gut health.
September
Knife sharpening:
This is one skill that will save some money and reduce the time spent in the kitchen. To know how to truly sharpen a knife instead of just buying a “knife sharpener” will allow you to make razor sharp knives last until there isn’t enough blade left to cut with, instead of getting a new knife every time one becomes too dull or nicked to cut well.
October
Sewing:
Laugh if you want, but I think it’s silly to throw something away because it had a hole in it. I already have rudimentary hand stitching knowledge, but I intend to learn how to use a sewing machine and fix nearly anything by the end of oct.
November
Plant propagation/grafting:
Plants aren’t cheap, and propagation is an easy way to get free plants. On a small property, it’s an opportunity to make some money on the side, while on a large property it’s the difference between a few hundred dollars cost and tens of thousands of dollars. Early winter is typically the ideal time for hardwood cuttings, but I fully expect I’ll start playing with this earlier in the year.
December
Woodworking:
Another one I’ll likely start early in the year, as this isn’t something you can truly learn in a month, but I’d like to learn a lot more about wood working by the end of the year.
It goes without saying that I’m ambitious enough to try to get this list done early, or add other skills to my tool belt, but this is more of my hard-line minimum.
What are your plans for the year?
So, it’s been a while, and that’s my fault. I started this site at a big transition point in my life and thought I’d be able to keep up with everything I’ve wanted to try. I spent a lot of time getting ready to move into my house and adjusting to a new job. I’ve made several batches of cider and wine, I think my strawberry wine is my biggest success so far! I ordered five fruit trees and several more plants (I will update soon about putting plants “to bed” for the winter) and built an indoor a-frame grow stand to try my hand at growing microgreens and protect my more sensitive/younger plants that I began growing at a bad time of year. I now can and dehydrate excess food, though I will readily admit canning is a huge pain, so I got a pressure cooker that can pressure-can and will control the temperature and pressure so I don’t have to sit in front of the stove for hours at a time! I had a worm bin that was working fairly well, until i had to leave for vacation and they all died; I will likely start a bigger one up this spring now that I will have the space with a true yard.
The last year has kept me primarily very busy with the house, I’ve installed a more efficient wood burning stove into the old fireplace, made several repairs to the house which was ruined by renters, replaced the kitchen floor, completely remodeled the bathroom, had a tree cut down from the back yard to let in some light for my future garden (and saved the entire thing for firewood and mulch) and then fenced in and cleaned up the back yard for our new rescue pup, and turned one of our spare rooms into a full on pantry with shelving and two full freezers.
This fall I got a mother-load of free mulch from a local tree trimming company and several trailer loads of horse manure from a local stable to prepare the garden for vegetables next spring. I had so much mulch I figured I may as well mulch the entire perimeter of the property and certain key areas of the front of my property to keep it clean but also establish plenty of beds to plant into. I plan to plant many varieties of productive plants into these mulch beds this spring beyond what will be going into the garden. I’m going to over plant like crazy and STUN them (Sheer, Total, Utter, Neglect); whatever survives without too much work will be used to grow stronger plants next year, and whatever dies will be sent to my new compost pile!
I make my own shampoo, clothes washing detergent, deodorant, and toothpaste, and support a family that makes soap by hand. For this Christmas, me and Lady Tinker crafted homemade gift baskets for everyone, including a crocheted basket for the gifts and a soap scrub, bath bombs, homemade sugar scrub, and an amazing new comfrey-plantain healing salve which will definitely be a steady item in the Tinkerer household.
Writing this all out, it looks like I have done much more than I initially thought I did. But trust me, there is much more to come this year! Follow me on my journey, and hopefully I will inspire you to try something new that will lead you to a more self-dependent, fulfilling lifestyle.
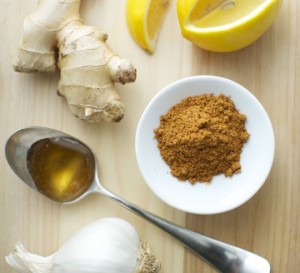
Have you or anyone in your family gotten sick yet? Hesitant to take any medication when you don’t know the ingredients, let alone know how to pronounce them? Web-MD has some good advice on preventing it in the first place, in addition to natural remedies to help your body fight it off.
some foods that naturally help prevent illness photo compliments of stylemegreen.net
I found the first step especially interesting, they explain physiologically why you get the fever, runny nose, etc. and how it helps fight off an illness. I know I can’t be the only one to wonder why I get congested and wish I could just rip my sinuses out of my head so I could breathe. Now I know.